Video Tutorials
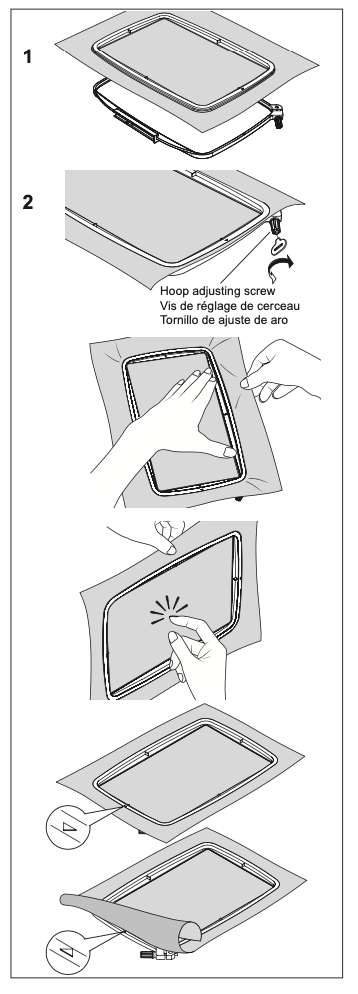
Securing Fabric in Embroidery Hoop
- Loosen hoop adjusting screw and place fabric between inner and outer frame. Pull fabric edges to remove slack.
- Slightly tighten the hoop, adjust the screw and pull fabric edges to remove slack. Fit the two frames together by pressing down on the inner frame.
- Tighten the hoop’s screw then remove the slack from the stabilizer.
- Continue tightening the hoop adjusting screw while removing the slack until the fabric is properly secured within the embroidery hoop.
- Once the fabric is taut, tighten the adjustment screw once the stabilizer is secured.
Preparing the Machine Before Installing the Hoop
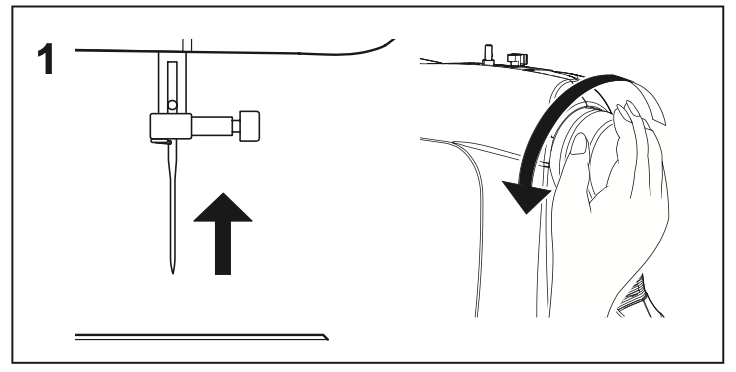
Turn the handwheel counterclockwise (toward you) until the needle comes to its highest position.
Attaching and Removing Embroidery Hoop
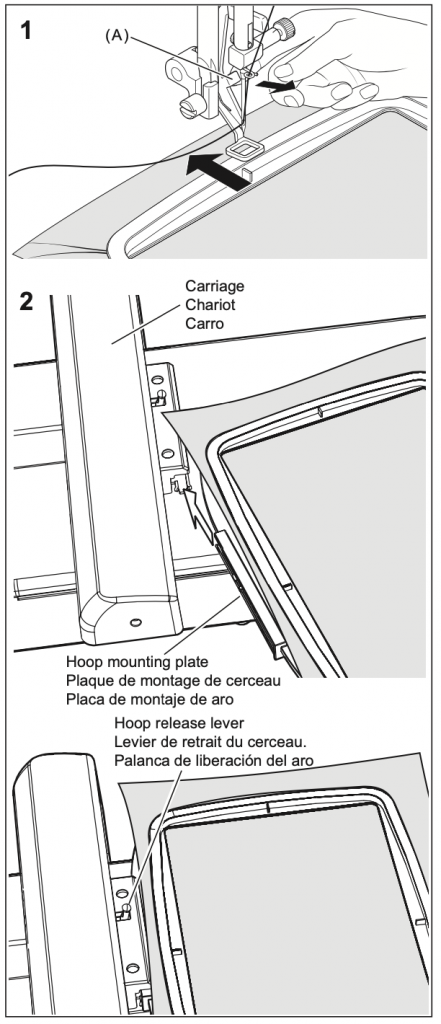
- Raise presser foot and needle, and push up lever (A) of embroidery foot with your finger and pass embroidery hoop under it.
- To remove, pull the hoop forward to slide it out from underneath the embroidery foot.
- To remove, pull the hoop forward to slide it out from underneath the embroidery foot.
- Slide the hoop onto the embroidery unit from front to back until it clicks into place.
- To remove, press the release lever and slide the hoop towards you.
Note: Before attaching the small hoop, turn on the power switch to move the carriage to embroidering standby position.
Material Selection
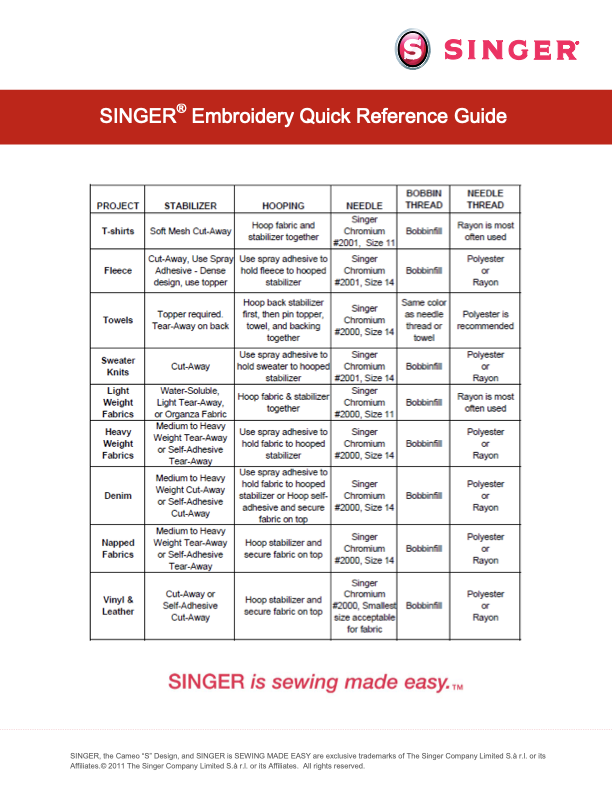
It is important to select the correct stabilizer(s), thread, and needle for the material being used. Singer has provided an excellent starting point (see below).
Stabilizer and Fabric Hooped Together
- Cut 1 piece of non-woven fabric stabilizer (tear-away, self-adhesive, or cut-away) that is 1.5 to 2 inches bigger on all sides than the embroidery hoop.
- Loosen hoop adjusting screw and place fabric between inner and outer frame. Pull fabric edges to remove slack.
- Slightly tighten the hoop and adjust the screw and pull fabric edges to remove slack. Fit the two frames together by pressing down on the inner frame.
- Tighten the hoop’s screw then remove the slack from the stabilizer.
- Continue tightening the hoop adjusting screw while removing the slack until the fabric is properly secured within the embroidery hoop. The stabilizer should be pulled taut but not too much as it might tear.
- Tighten the adjustment screw once the stabilizer is secured.
Hooped Stabilizer with Fabric Secured on Top (with or without Spray Stabilizer)
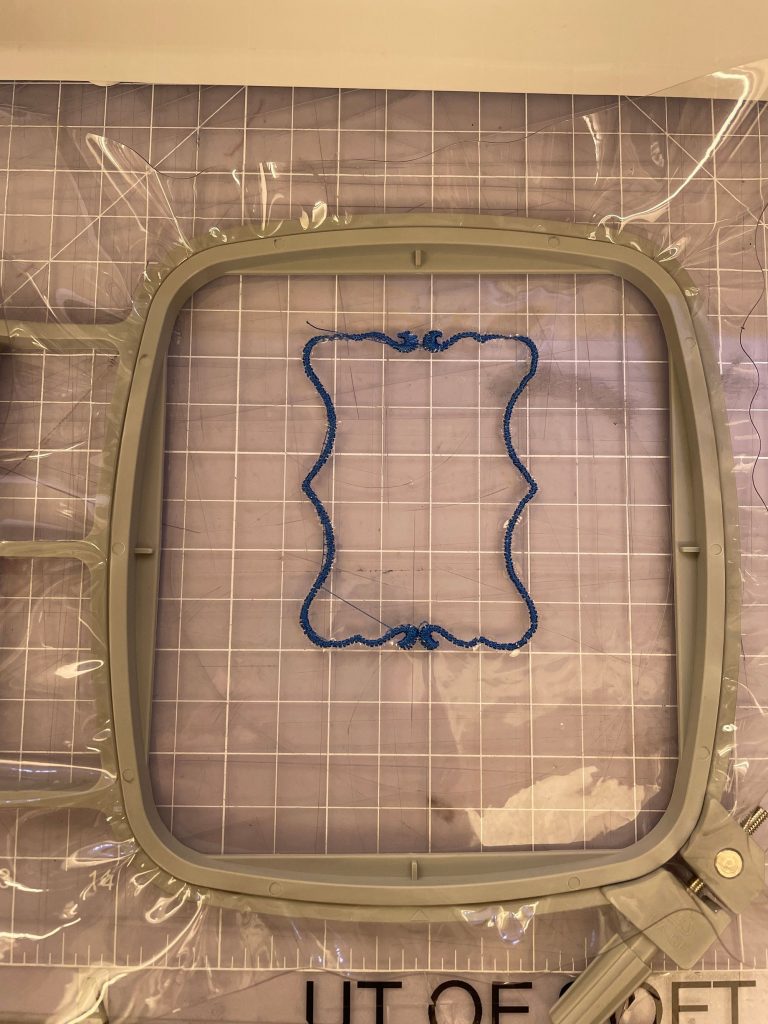
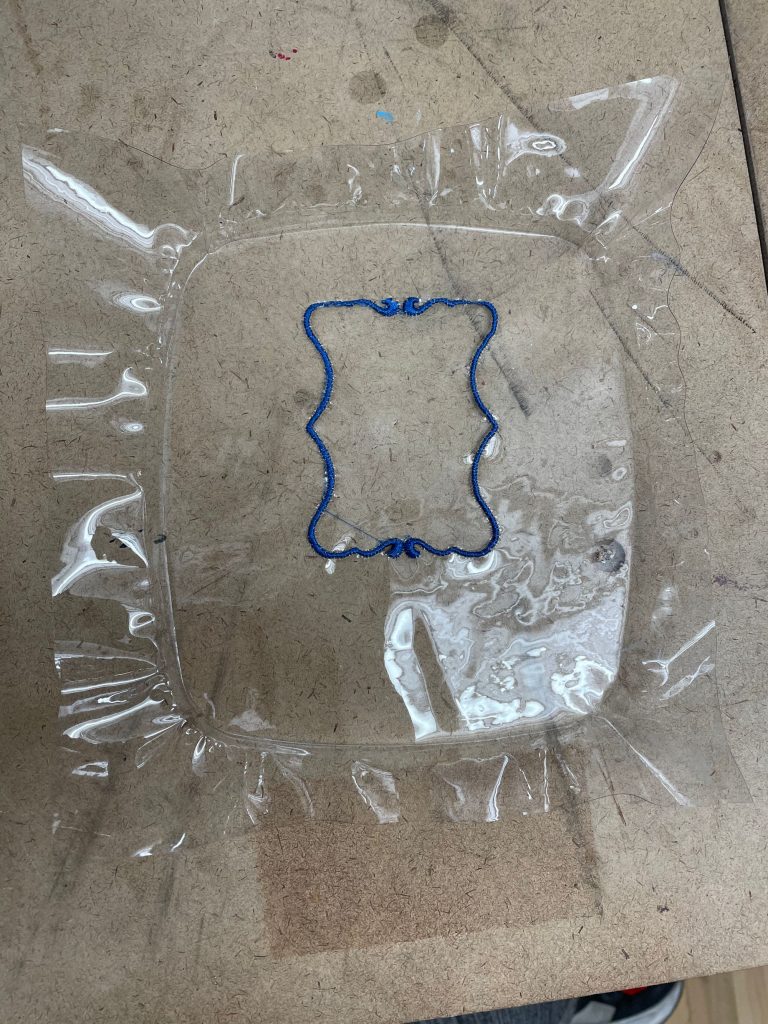
Some materials may be damaged when secured within the embroidery hoop (e.i. vinyl, leather, plastic, etc.). Those materials will need to be secured on top of the stabilizer which is secured within the hoop.
Example of why not to hoop these fabrics:
- Cut 1 piece of non-woven fabric stabilizer (tear-away, self-adhesive, or cut-away) that is 1.5 to 2 inches bigger on all sides than the embroidery hoop.
- Loosen hoop adjusting screw and place fabric between inner and outer frame. Pull fabric edges to remove slack.
- Slightly tighten the hoop and adjust the screw and pull fabric edges to remove slack. Fit the two frames together by pressing down on the inner frame.
- Tighten the hoop’s screw then remove the slack from the stabilizer.
- Continue tightening the hoop adjusting screw while removing the slack until the fabric is properly secured within the embroidery hoop. The stabilizer should be pulled taut but not too much as it might tear.
- Tighten the adjustment screw once the stabilizer is secured.
- Spray the wrong (back) side of the fabric to be embroidered with a spray adhesive.
- Place material on the hooped stabilizer and smooth flat.
- Slide the embroidery hoop into the machine and begin stitching.