- Download and open the “Helix Mini Template”. This template is set up for the Helix mini.
- Artboard is set to the extent of the cutting bed.
- Color space is set to RGB.
- The color palette has laser-compatible color swatches.
- Either copy and paste your artwork onto the template or create your artwork directly in the template.
- Place all artwork starting at the upper left corner of the artboard, this is the origin position for the laser cutter.
- Save your document as a unique descriptive name.

2
Check the following attributes for each object on the artboard.
A. Color-should be an RGB swatch included on the template.
B. Stoke Weight-should be 0.01 pt
C. Variable Width Profile-should be Uniform
D. Brush Definition-should be Basic
E. Opacity-should be 100%
To check the attributes select all objects on the artboard and check the corresponding field at the top of the document.

3
Once all objects have been checked proceed to the print dialogue.
Navigate to the print dialogue box clicking File>Print.

4
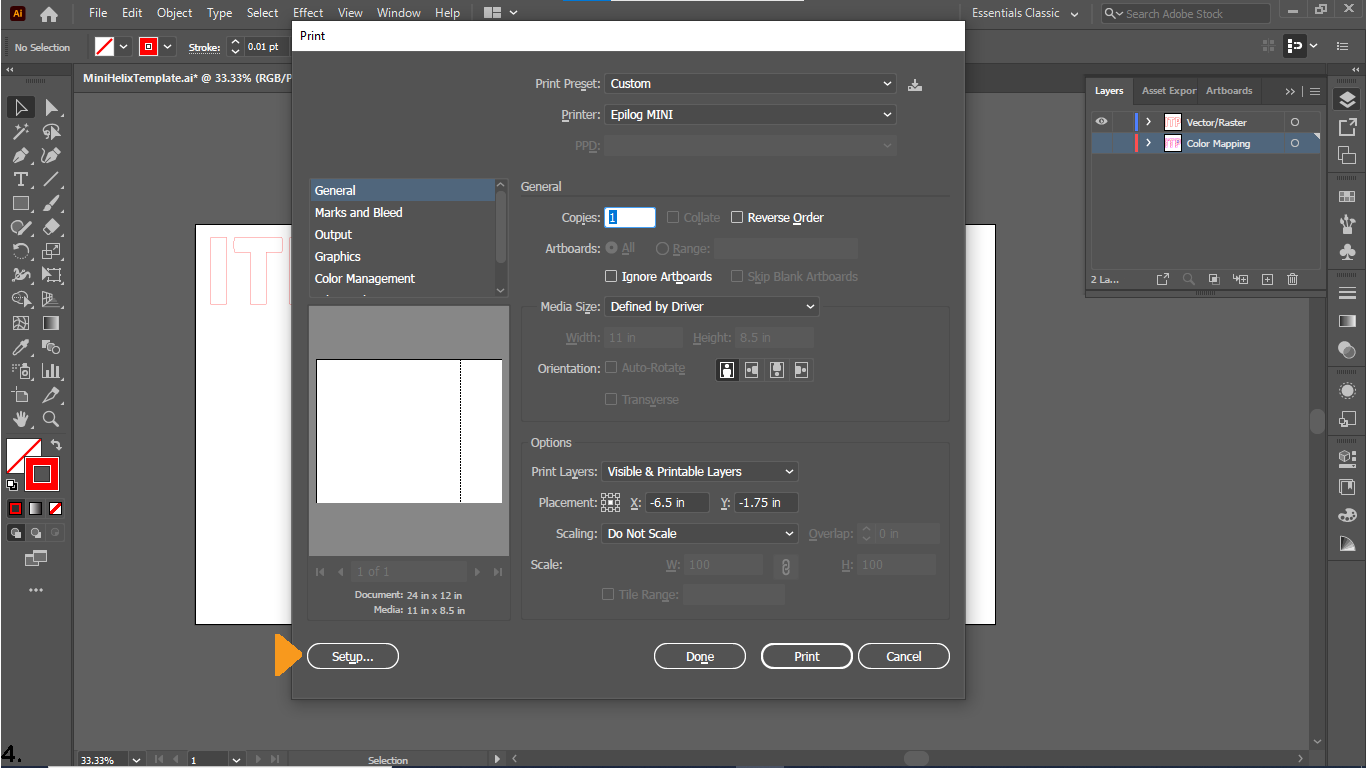
Once the print dialogue box appears click “Setup” in the lower left of the box.
5
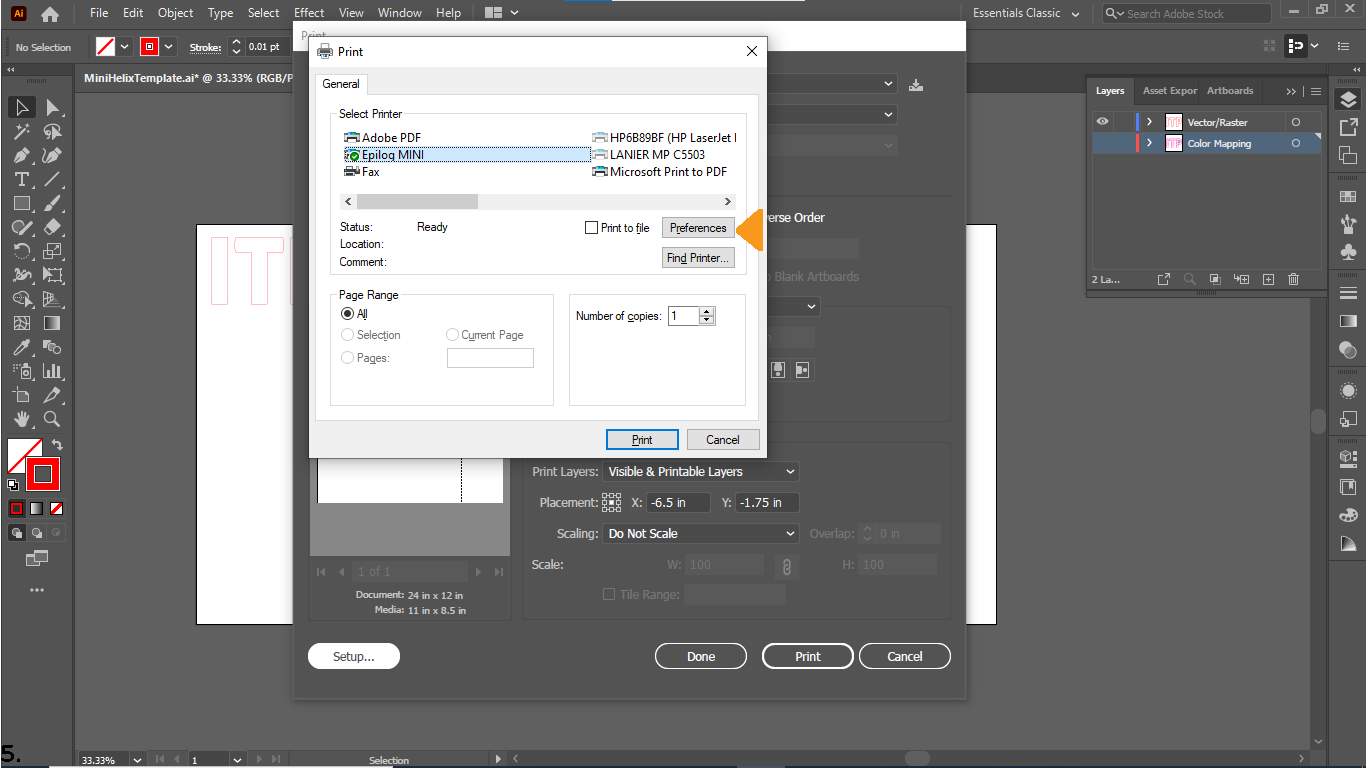
Inside the Setup dialogue Box click preferences located on the right side of the box.
6
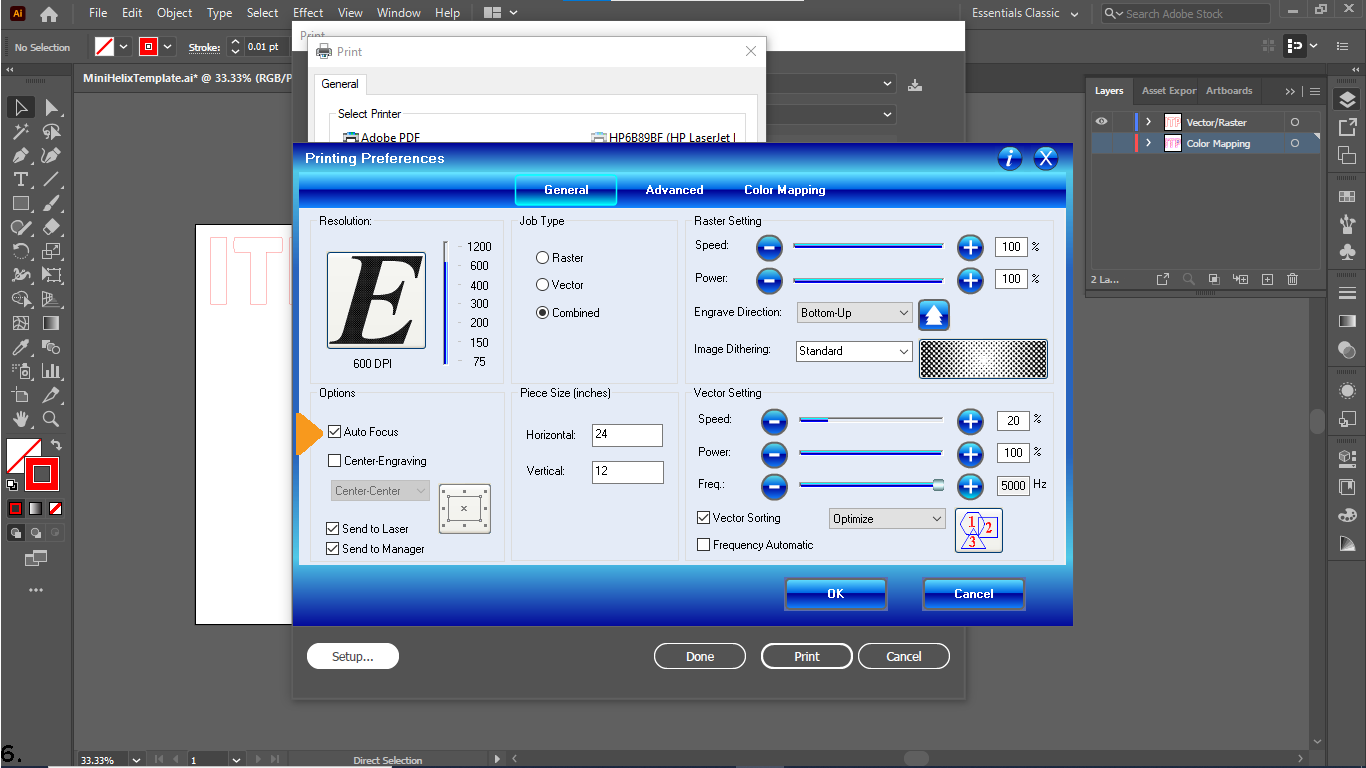
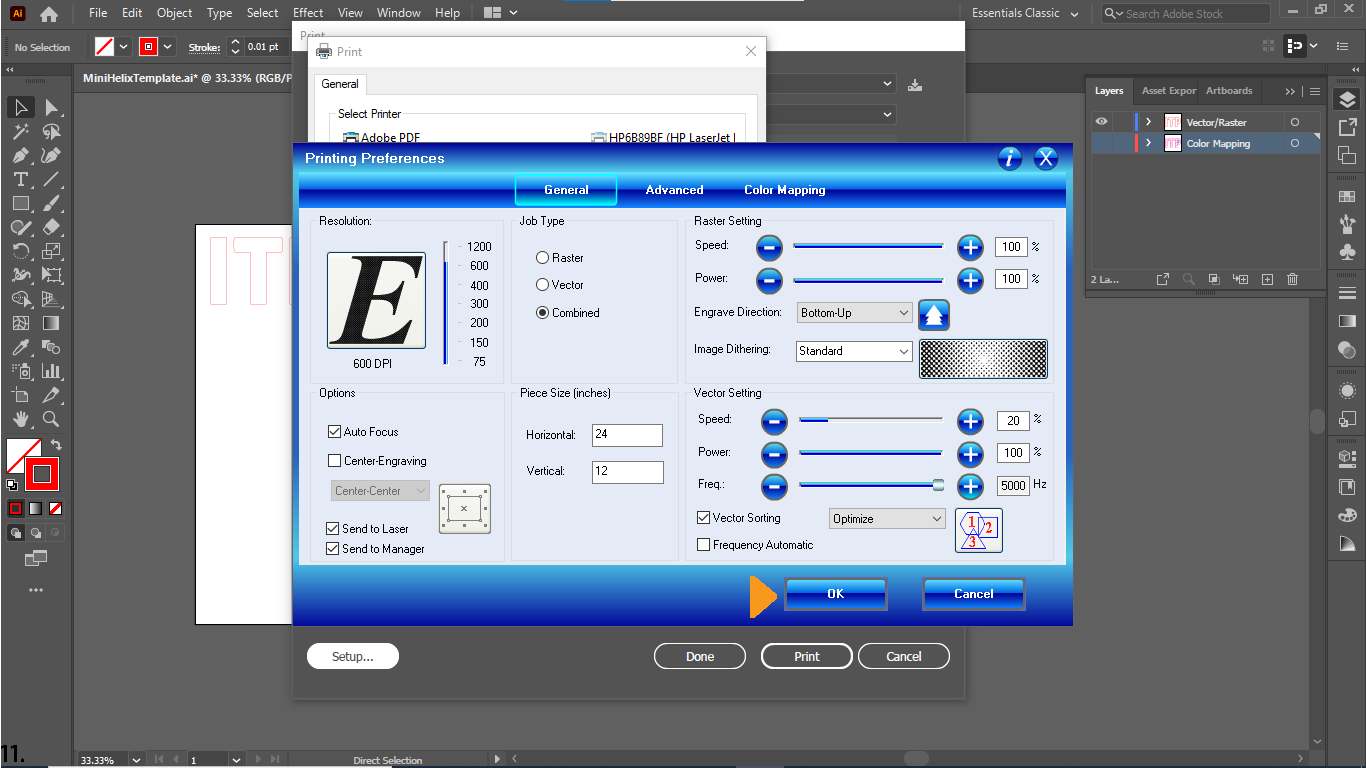
In the Printing Preferences dialogue box, check the box to the left of “Auto Focus”.
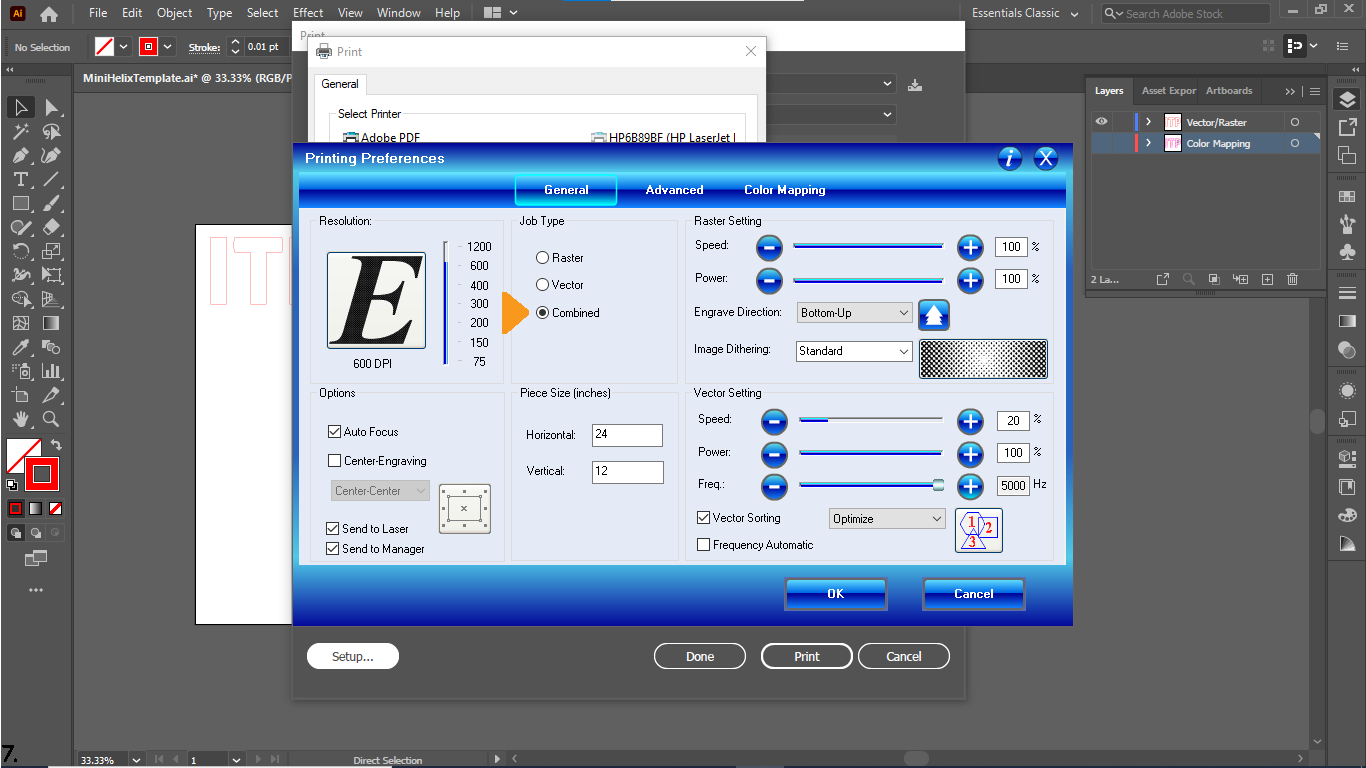
7
Check the radio button to the left of “Combined”.
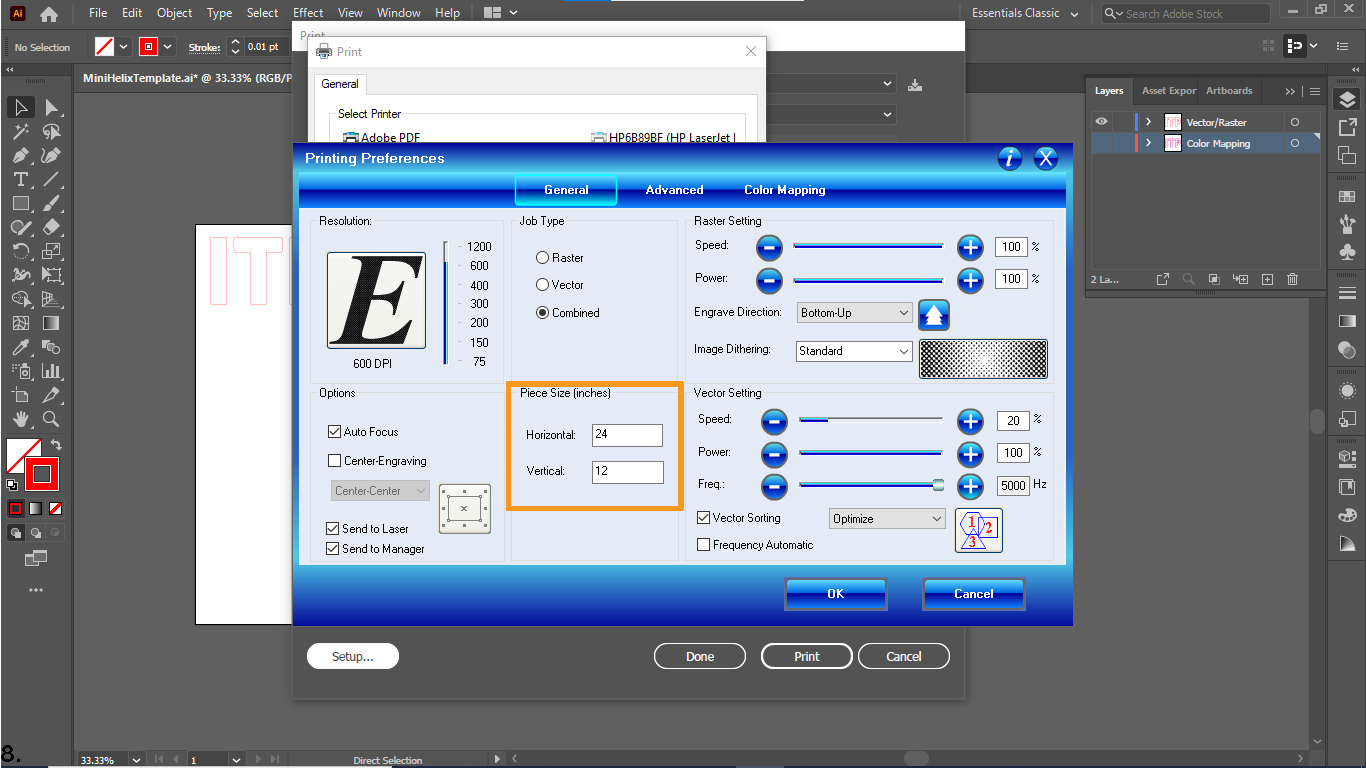
8
In the “Piece Size (inches) box set “Horizontal” to 24 and “Vertical” to 12.
9
In the “Raster Settings” box adjust “Speed” and “Power” and make sure “Engrave Direction” is set to “Bottom-Up”.
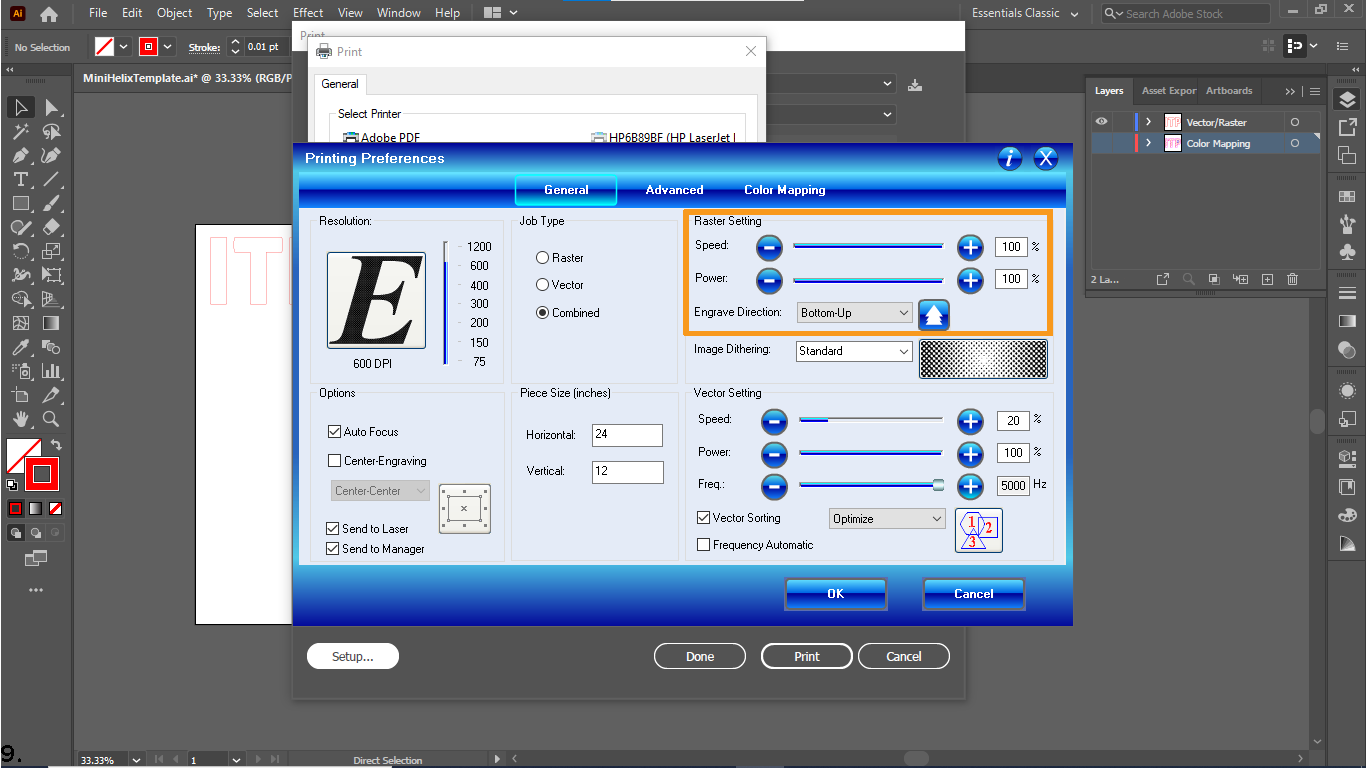
Note: Please use the settings listed on the material list. The list can be found on the wall next to the laser cutter as well as on the shop website under resources.
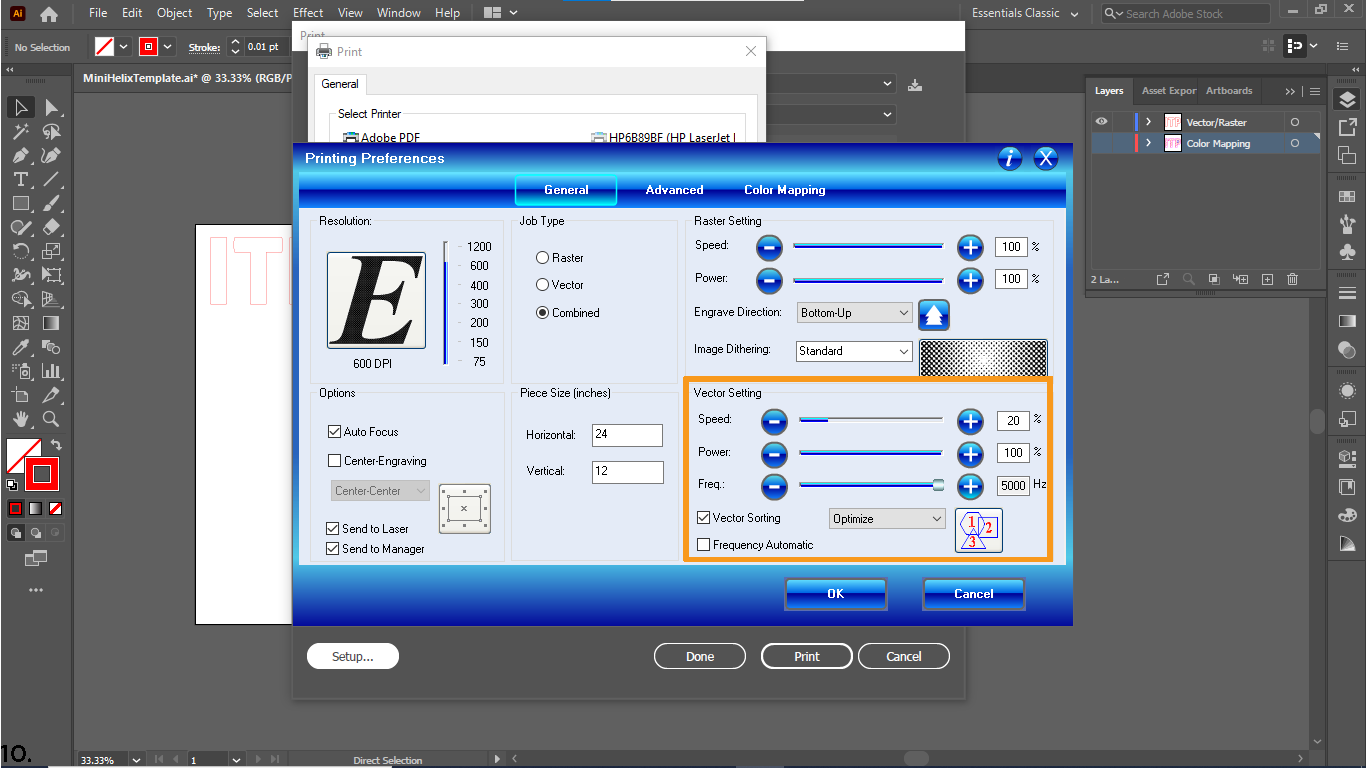
10
In the “Vector Settings” box adjust “Speed”, “Power”, and “Freq”.
Make sure “Vector Sorting” is checked and the drop-down menu next to it says “Optimize”.
11
Click “OK” at the bottom of the Printing Preferences dialogue box to save your changes.
12
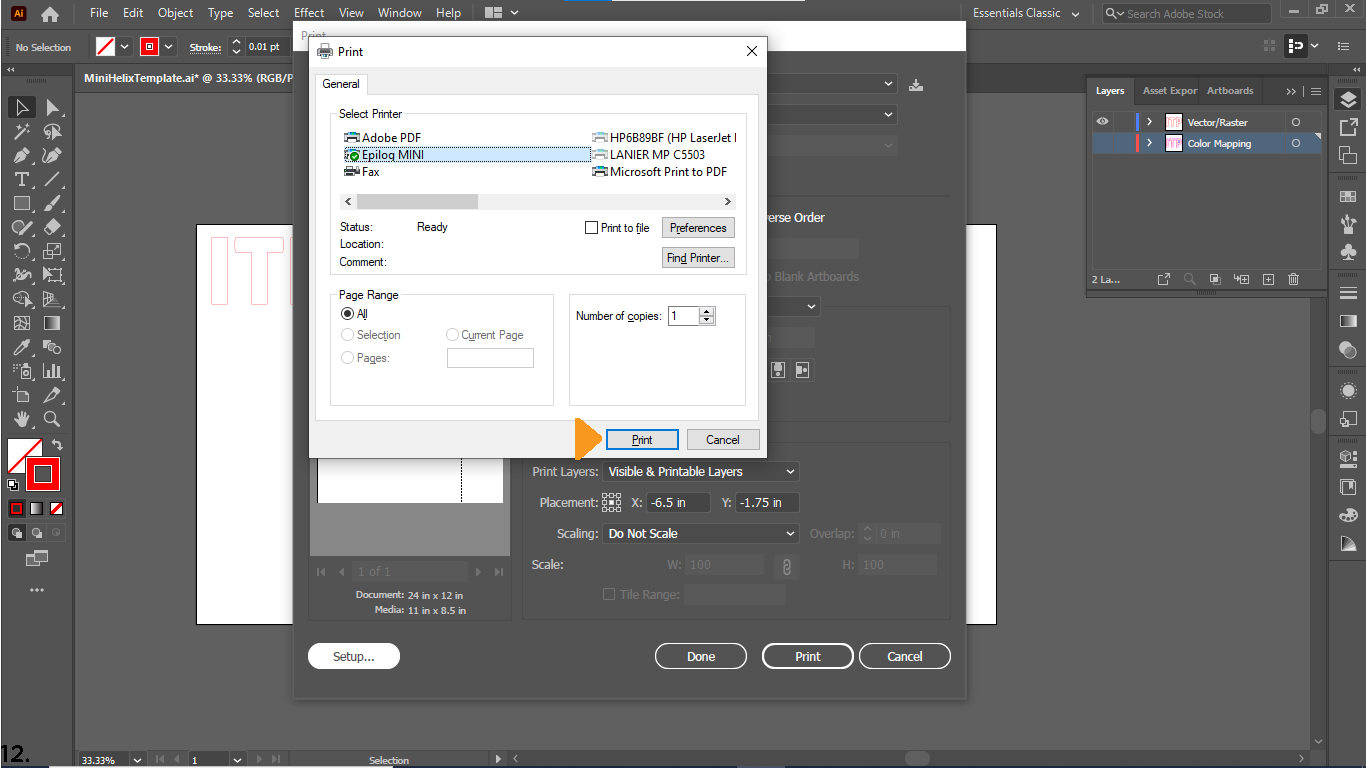
Click “Print” in the Setup dialogue box.
13
Click “Done” in the Print dialogue box.
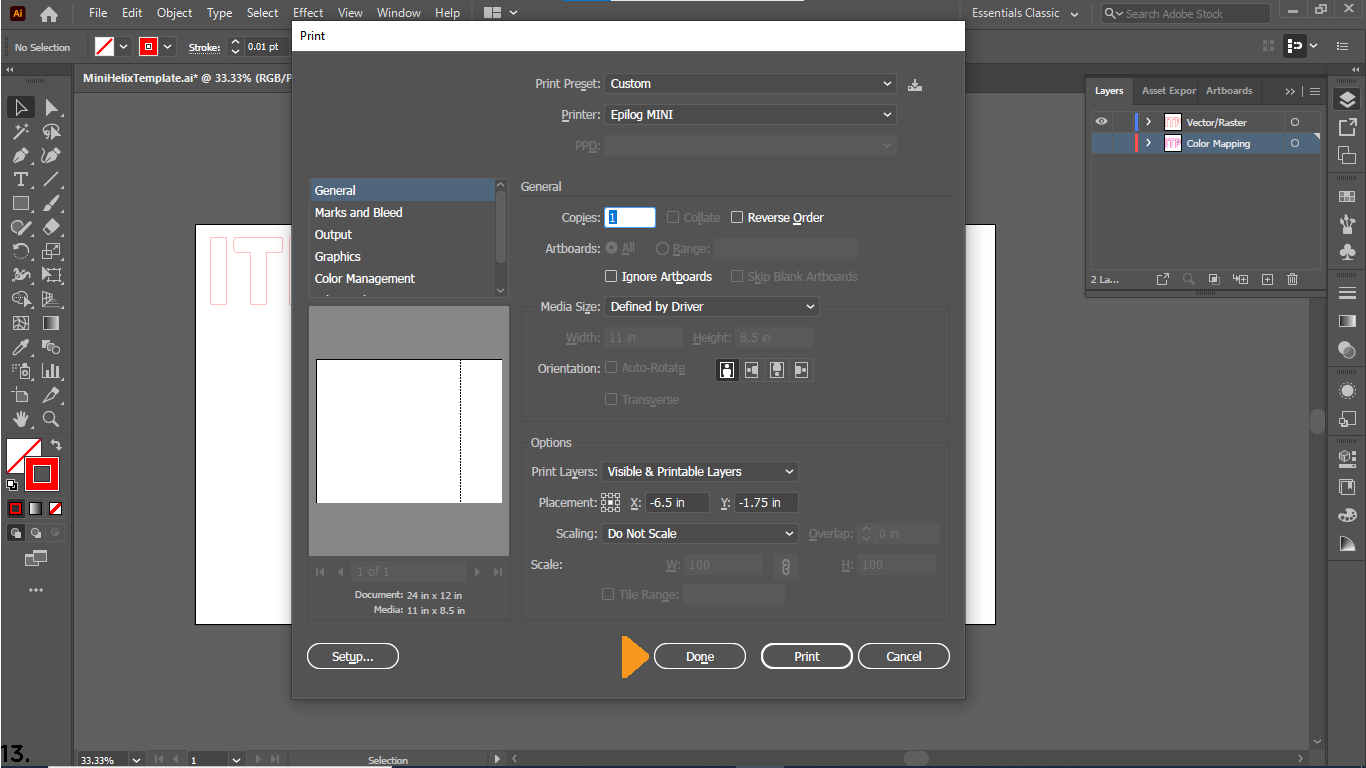
Note: Step 13 is a very important step, clicking “Done” will save all of the printing preferences to illustrator.
14
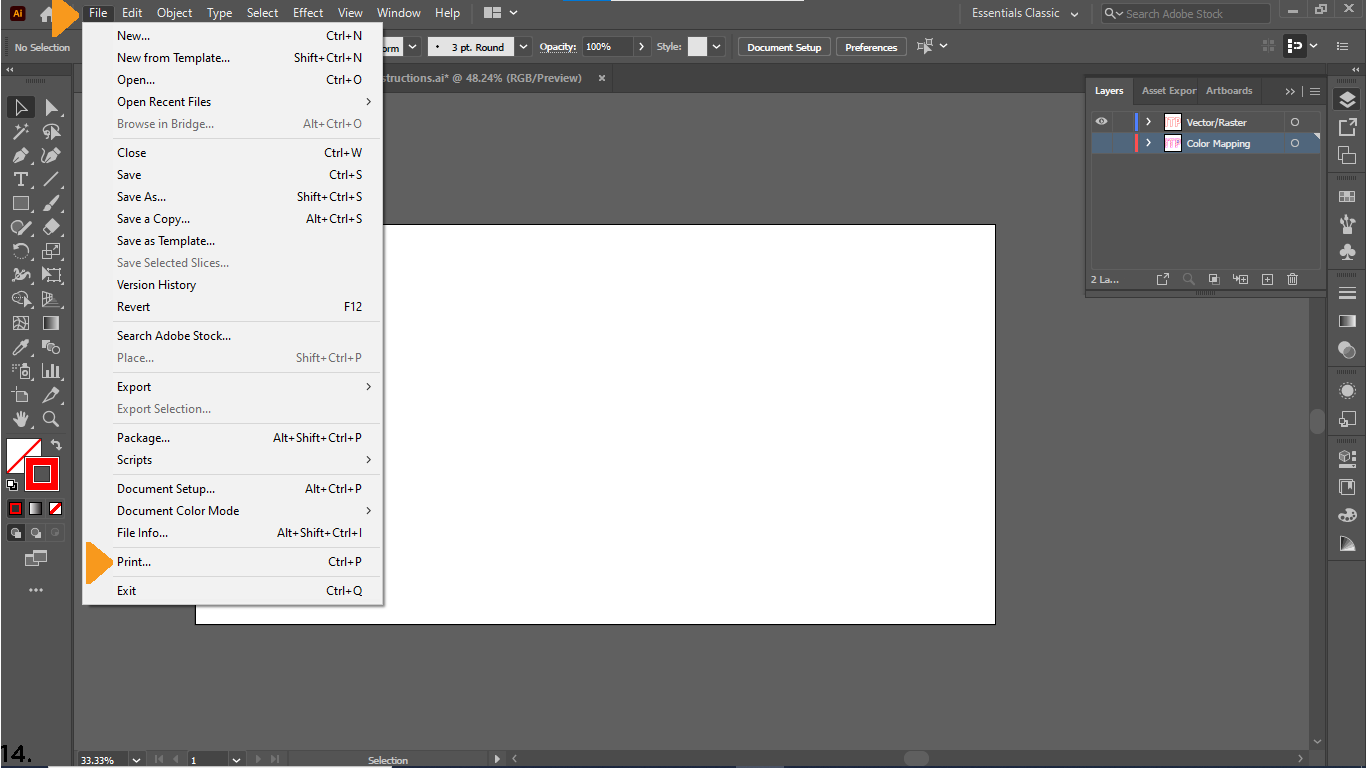
Once all objects have been checked, proceed to the print dialogue.
Navigate to the print dialogue box clicking File>Print.
15
Once the print dialogue box appears check that the “Document” and “Media” dimensions have changed to “24 in x 12 in”, then click “Print” in the lower right of the box.
The next steps will be on the laser cutter.

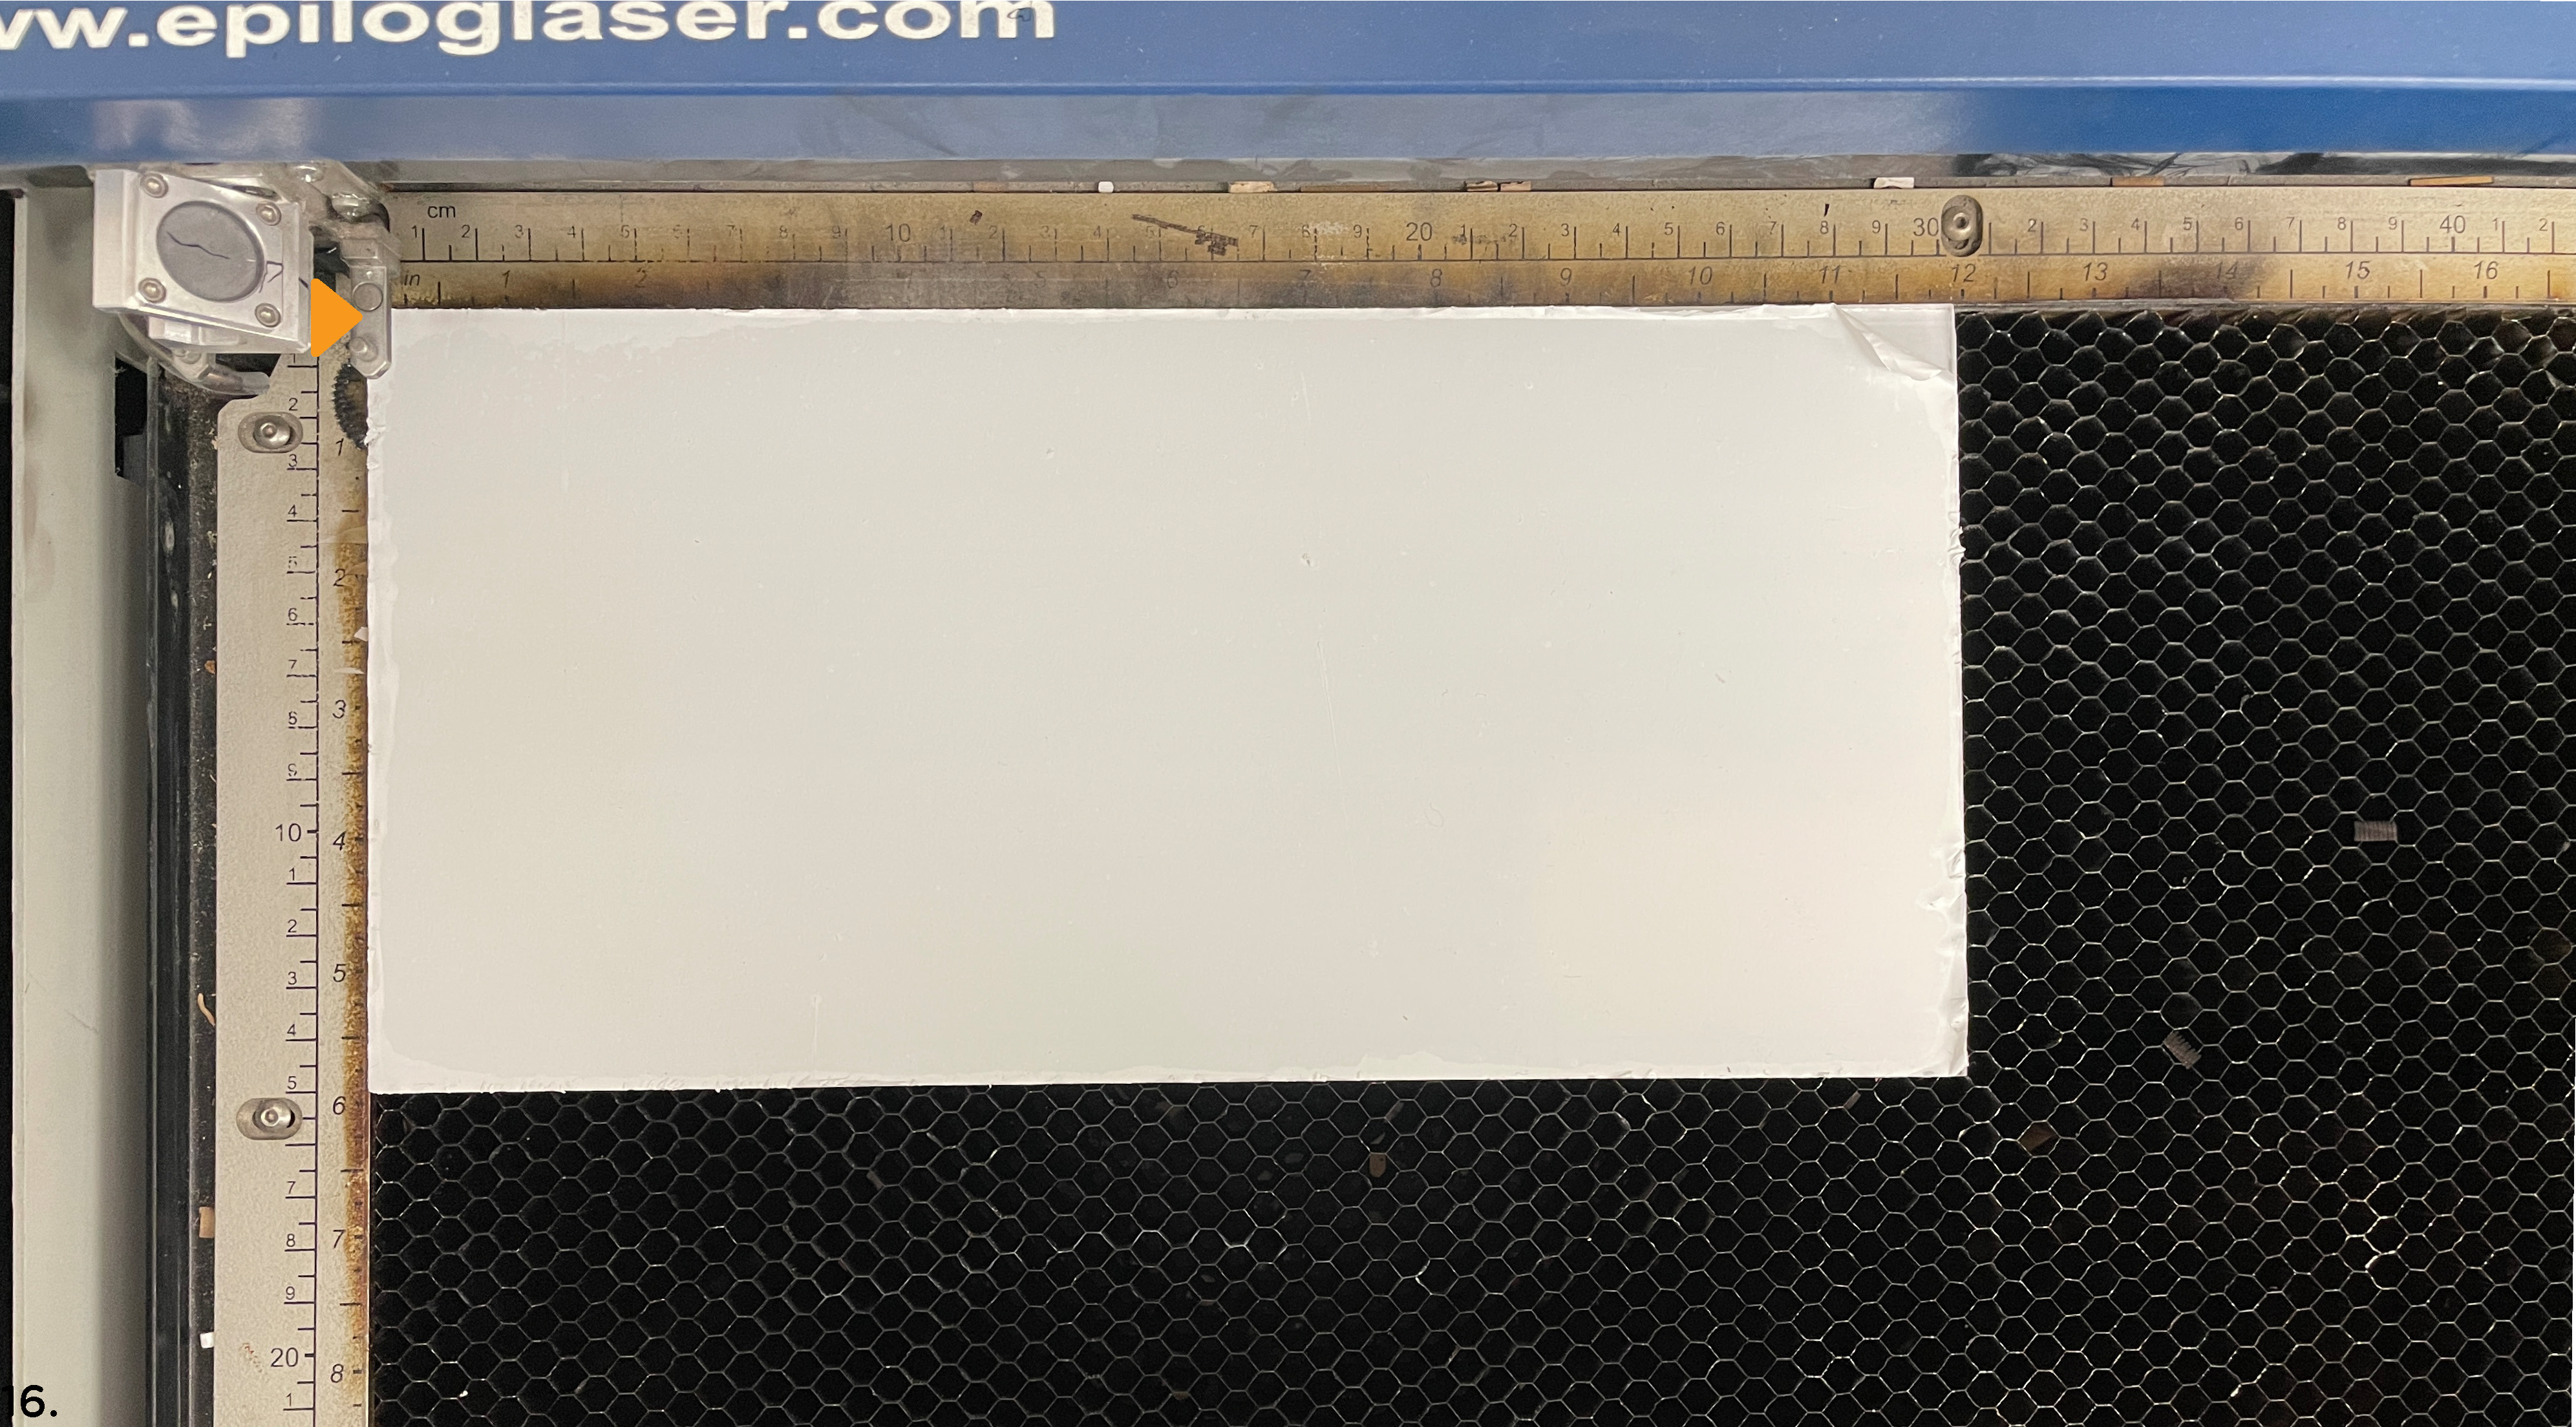
16
Place your material in the upper left-hand corner of the laser cutter bed.
- Turn on the laser cutter.
- Turn on the air compressor to the right of the laser cutter.
- Turn on the BOFA filter under the laser cutter.
- Close laser cutter lid.
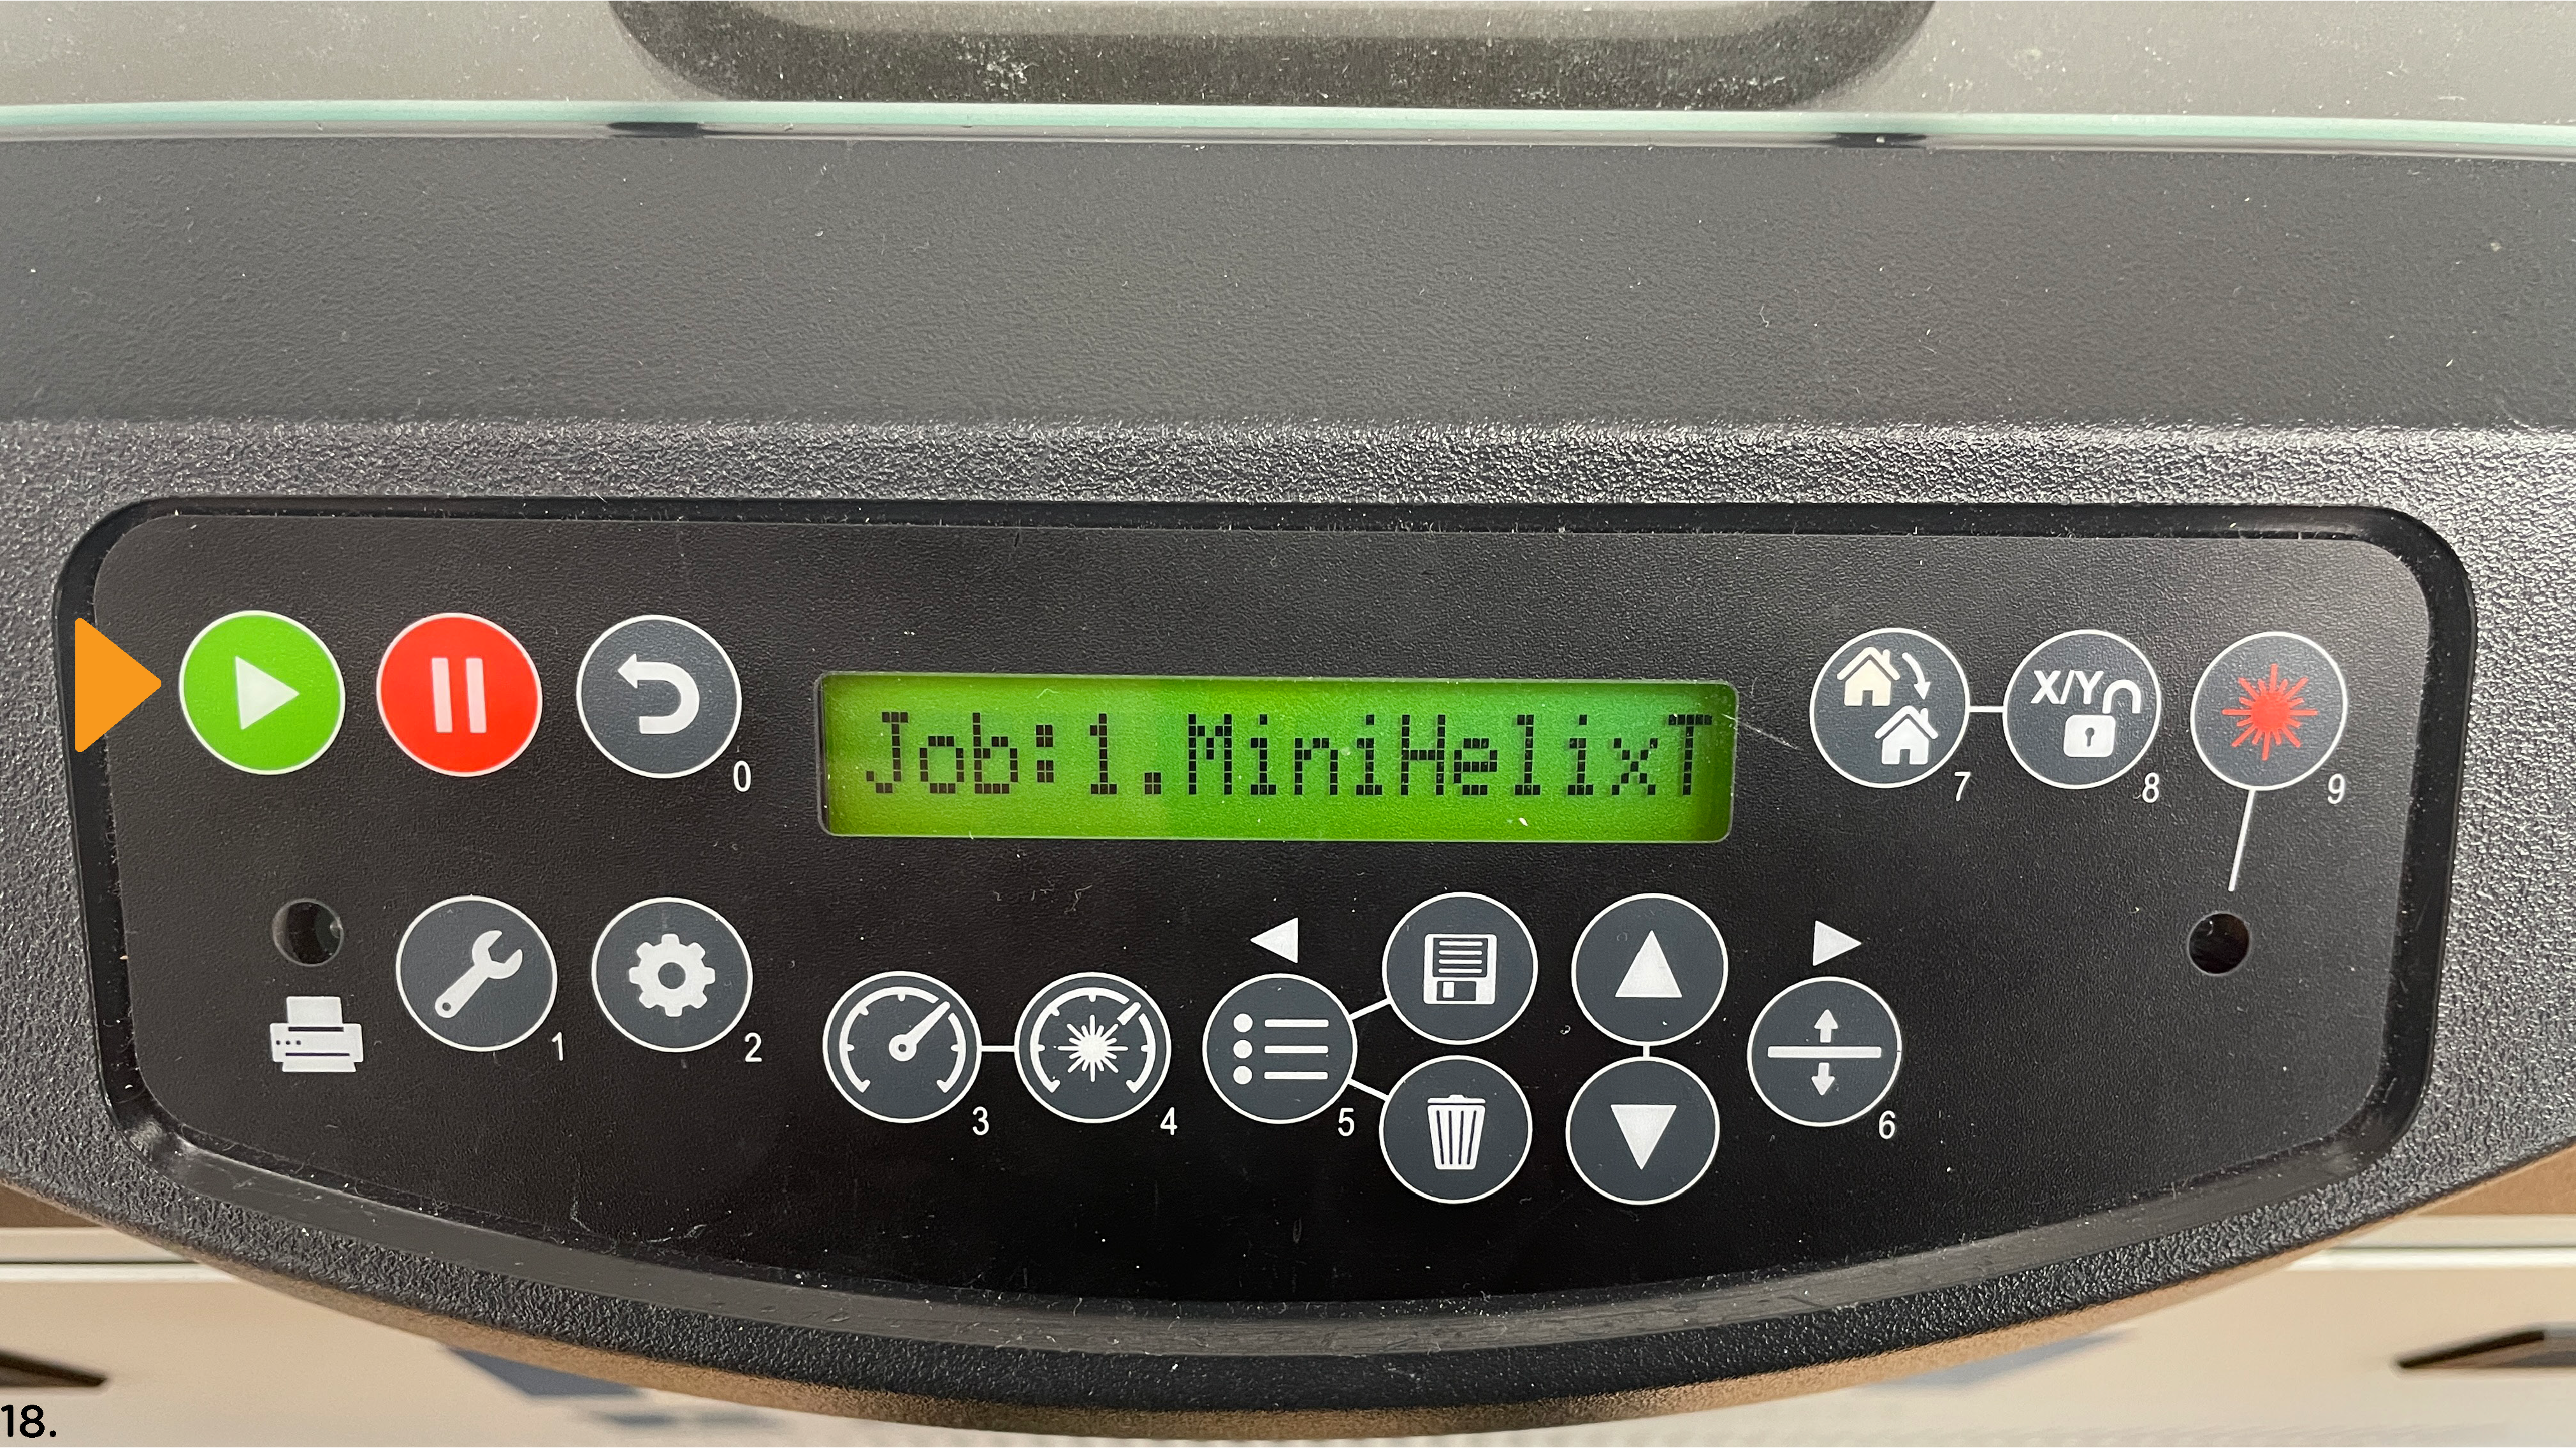
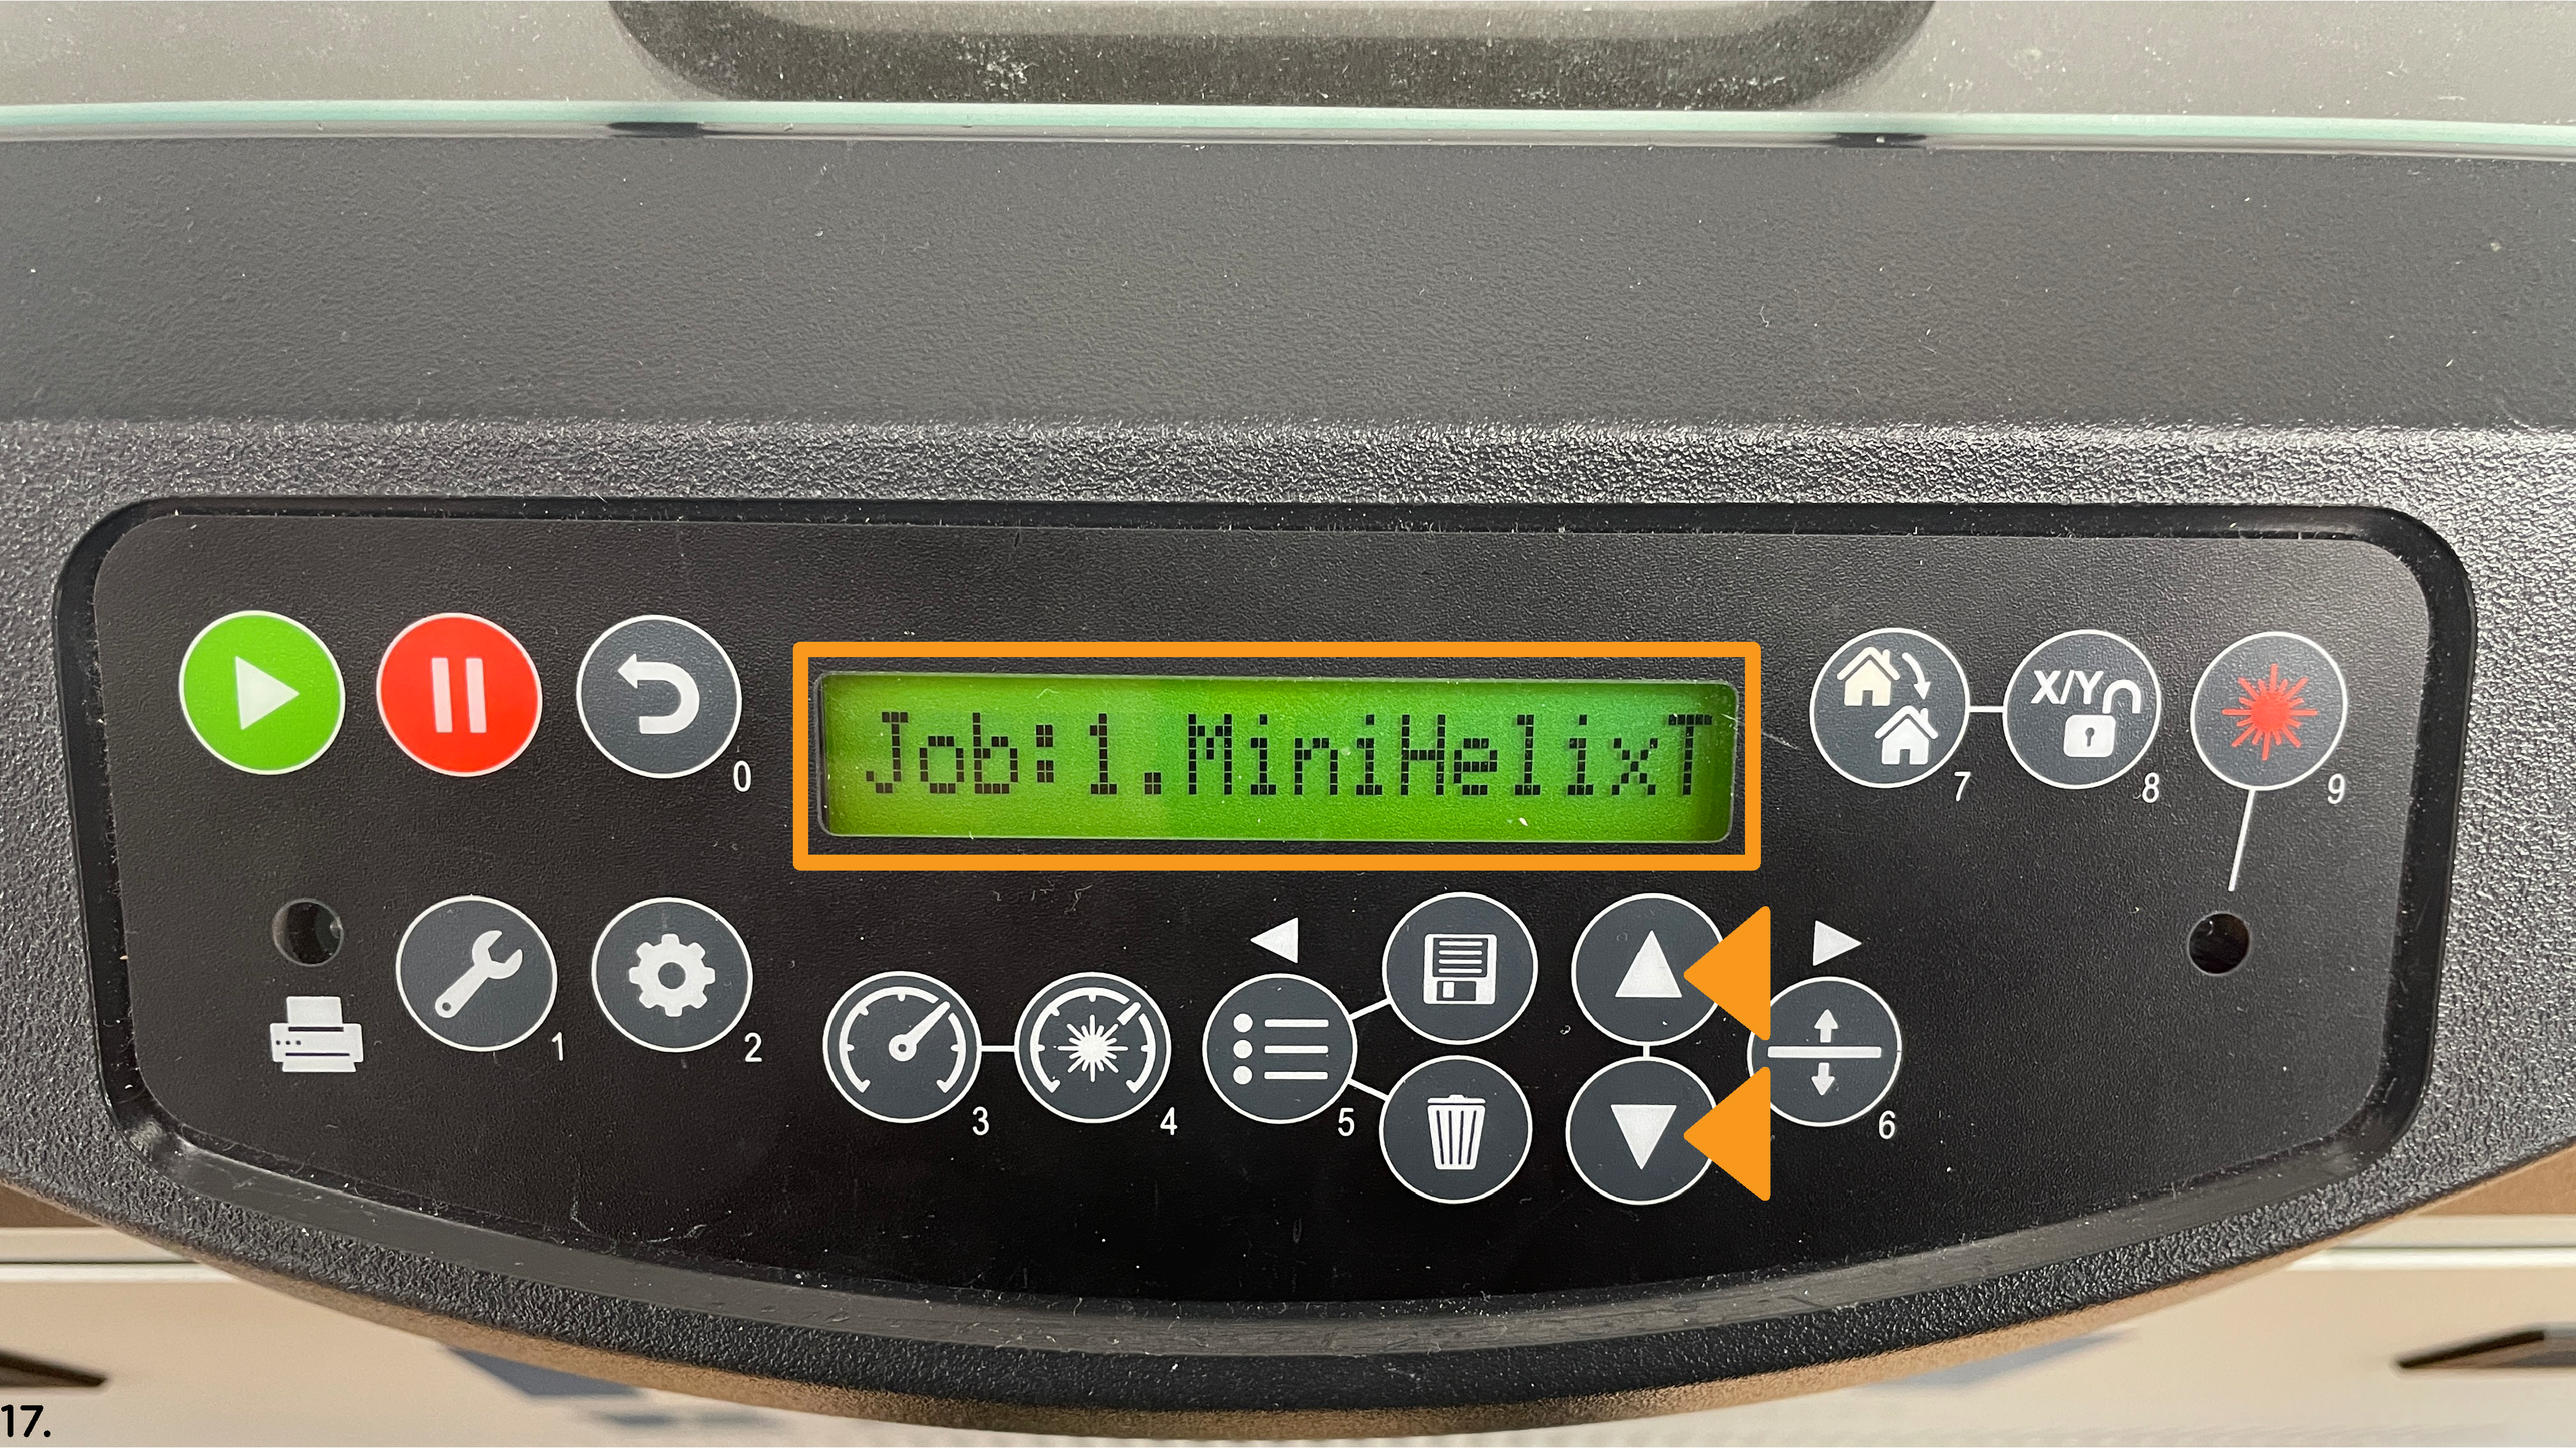
17
Make sure your file name is displayed on the screen.
If your file name does not appear in the window using the up and down arrow keys to navigate to your file.
18
Press the green start button to begin your job.
Never leave the laser while a job is being run.
Wait one minute after the job finishes to allow fumes to dissipate.
Shut off the machine power, air compressor, and BOFA filter when finished.