1.
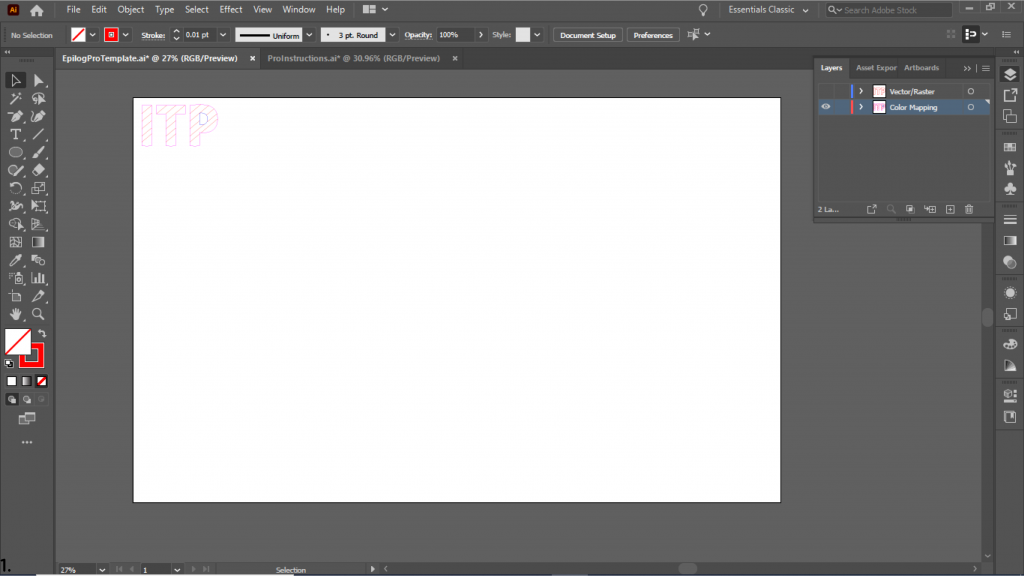
Download and open the “Epilog Fusion Pro Template”.
This template is set up for the Epilog Pro so you do not have to manually adjust the settings yourself. The preset includes:
- Artboard is set to the extent of the cutting bed: 30″ wide x 20″ high
- Color space is set to RGB.
- The color palette has laser-compatible color swatches.
Getting started with the file:
- Either copy and paste your artwork onto the template or create your artwork directly in the template.
- Place all artwork starting at the upper left corner of the artboard, this is the origin position for the laser cutter.
- Save your document as a unique descriptive name.
2.
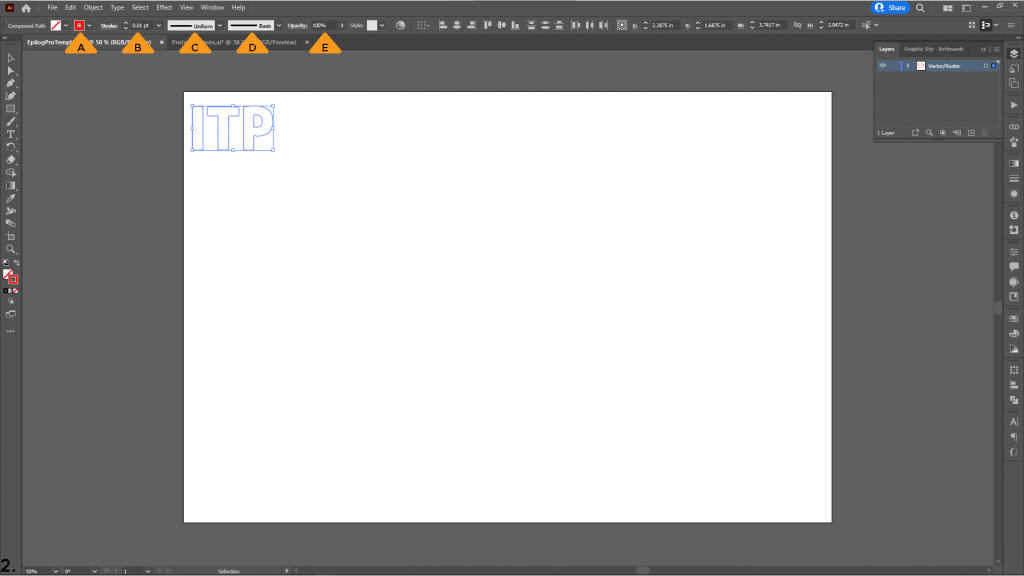
Check the following attributes for each object on the artboard.
A. Color-should be an RGB swatch included on the template.
B. Stoke Weight-should be 0.001 pt
C. Variable Width Profile-should be Uniform
D. Brush Definition-should be Basic
E. Opacity-should be 100%
To check the attributes select all objects on the artboard and check the corresponding field at the top of the document.
Note: Check these attributes on both your laptop and the laser cutter laptop. Sometimes the settings change when switching between computers.
3.
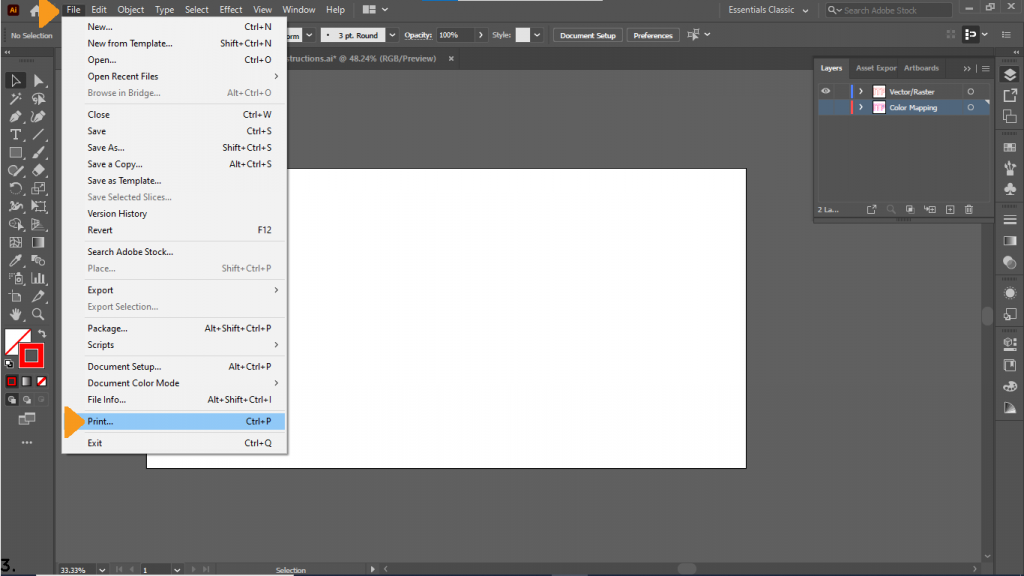
Once all objects have been checked proceed to the print dialogue.
Navigate to the print dialogue box clicking File>Print.
4.
Once the print dialogue box appears click “Print”, and continue instructions in “Epilog Dashboard”
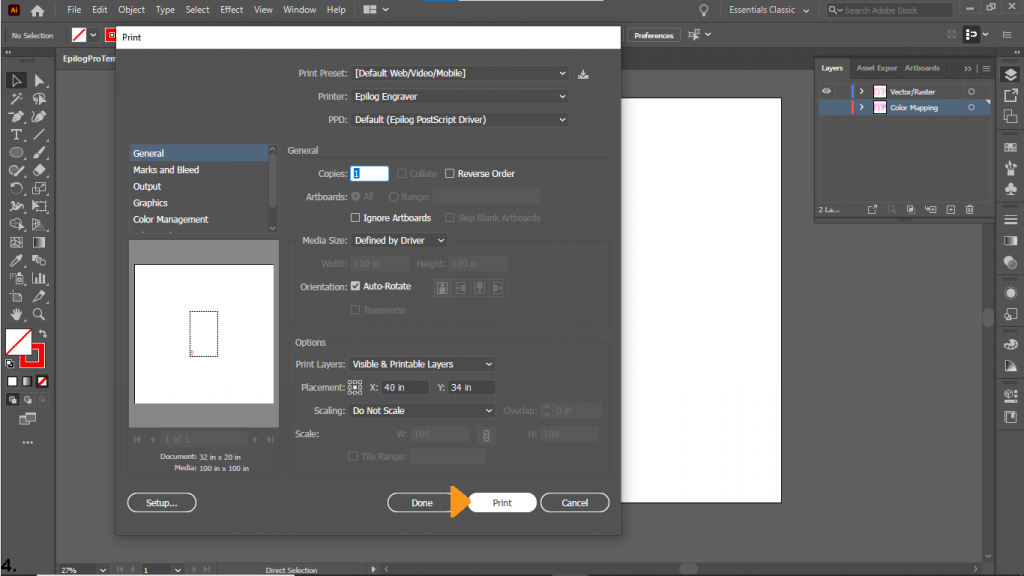
Note: This is different from the Helix Mini procedure.
5.
If the “Epilog Dashboard” does not open automatically, you can find it in the taskbar at the bottom of the screen.
In the main preview window, using the mouse wheel, scroll out till you see your artwork.
Select your artwork by clicking on it and dragging it to the upper left of the image of the laser bed.
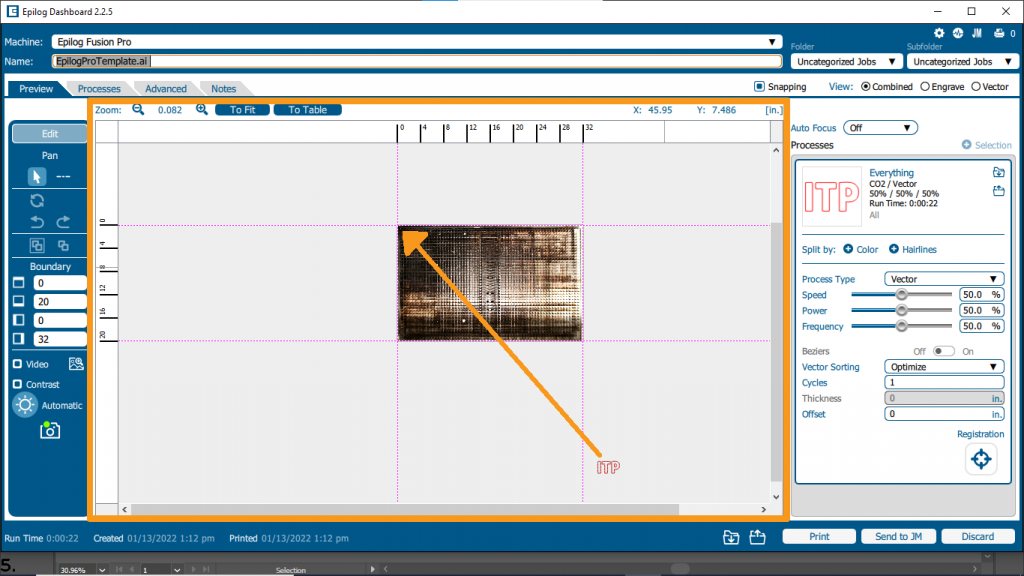
Note: Placing your material on the laser bed makes it easier to see you artwork once it is over the image in the preview window.
6.
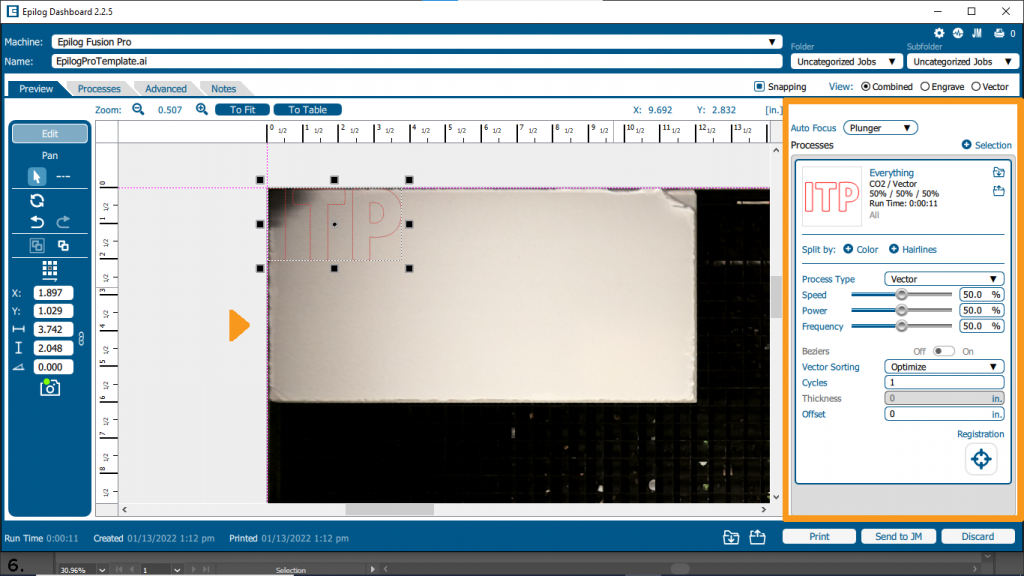
We will be working with the settings box on the right side of the preview window.
7.
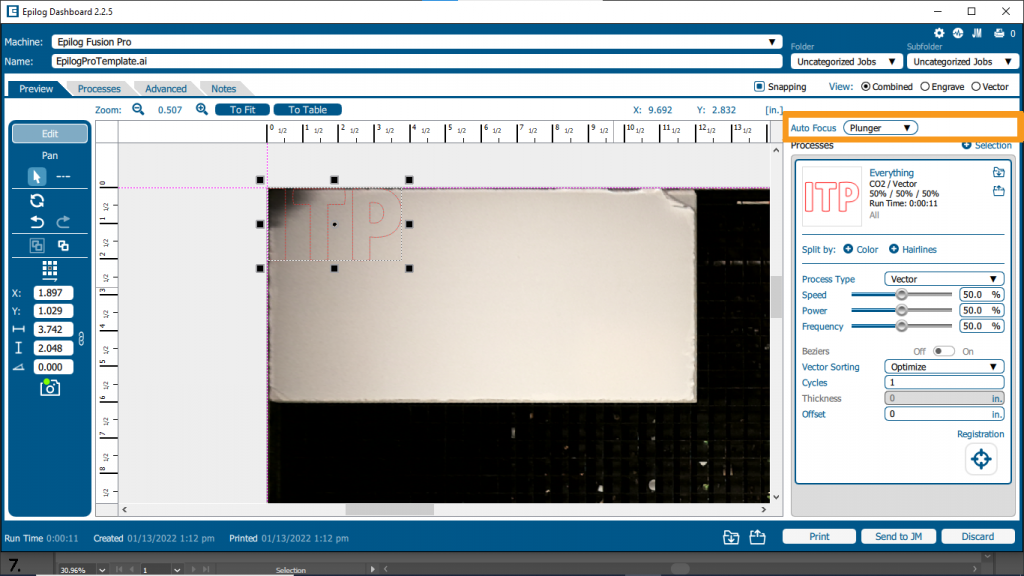
Make sure “Auto Focus” is set to “Plunger” by clicking the box to the right and selecting “Plunger”.
8.
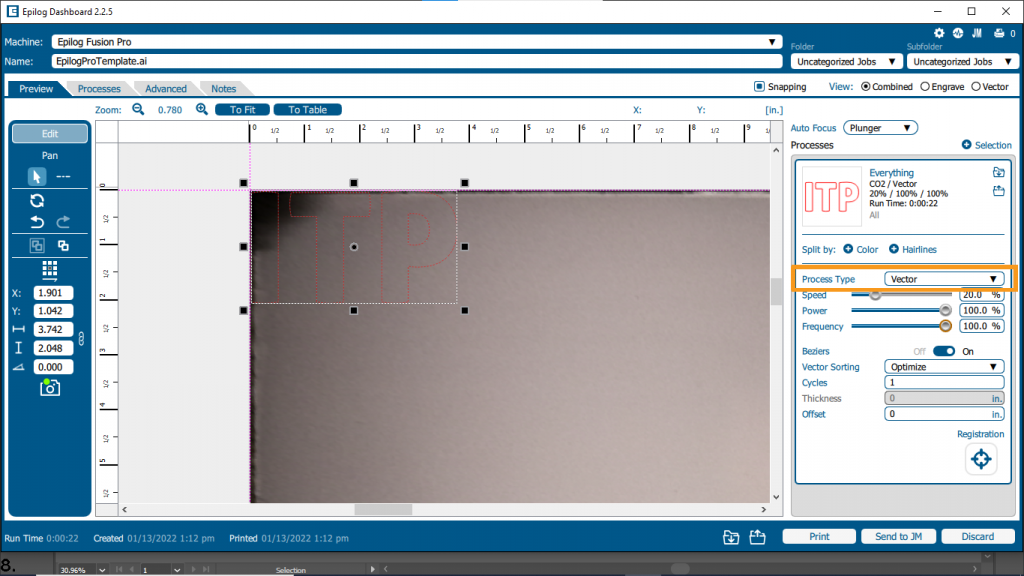
Select the appropriate “Process Type”. Cutting and engraving will be automatically split into different processes.
Ensure that the cutting mode is correct (Cutting = “Vector”, Engraving = “Engrave”)
9.
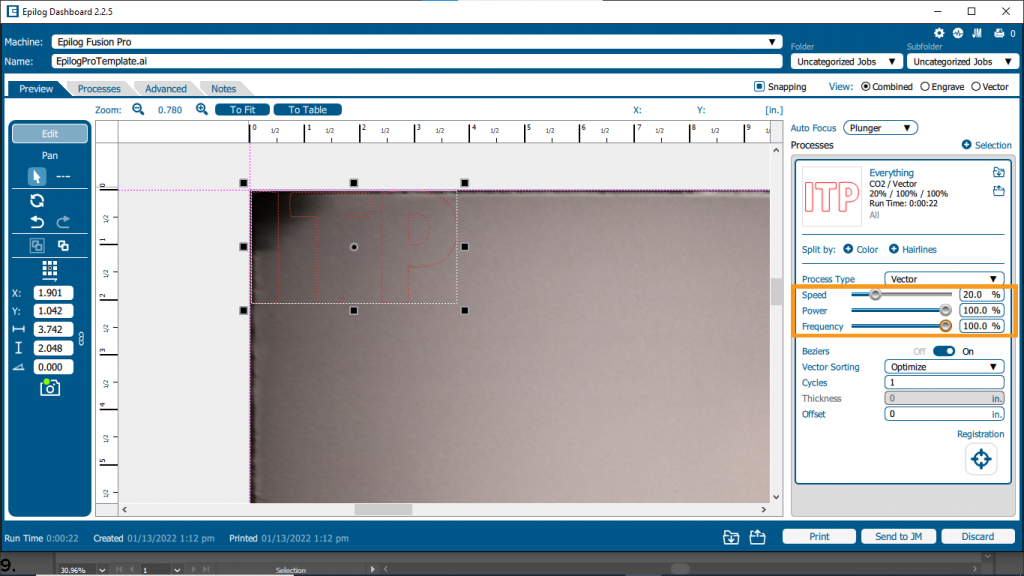
Set “Power”, “Speed”, and “Frequency” to match the setting for your material.
You can find this information on the material list, which is on the wall next to the laser cutter, as well as on the shop website under resources.
Note: If your material is not listed on the material list, please reach out to Phil and Ian to review and approval before cutting in the laser cutter.
10.
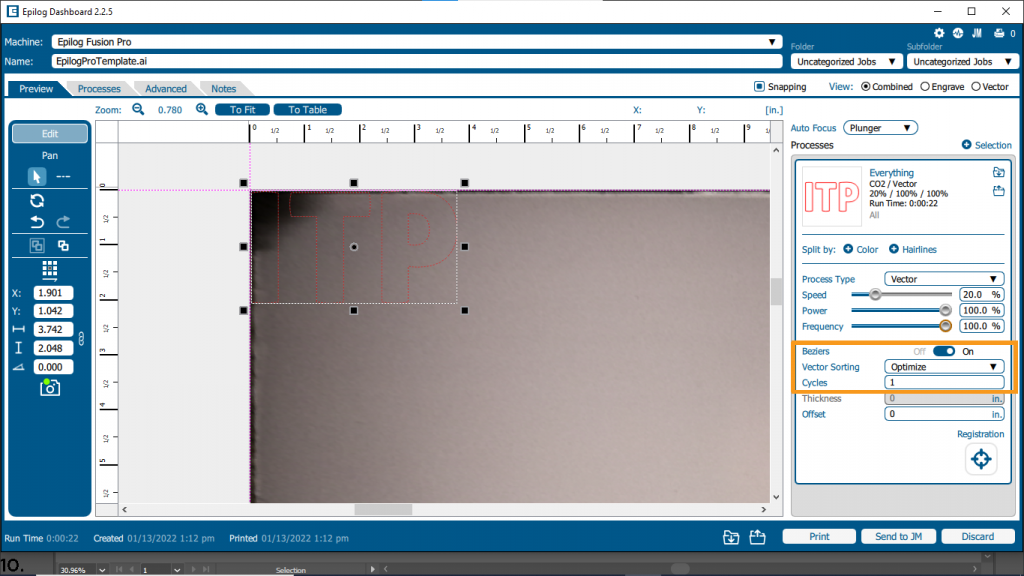
“Beziers” should be set to “On”.
“Vector Sorting” should be set to “Optimize”.
“Cycles” should be set to “1”.
11.
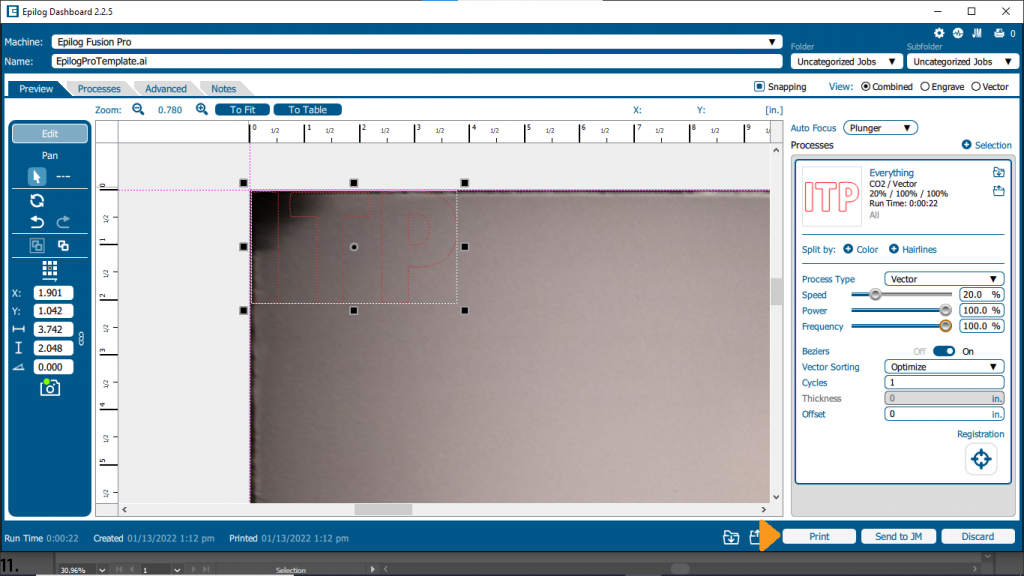
Click “Print” at bottom of the “Epilog Dashboard” to send the file to the laser cutter. The next steps will be on the laser cutter display.
12.
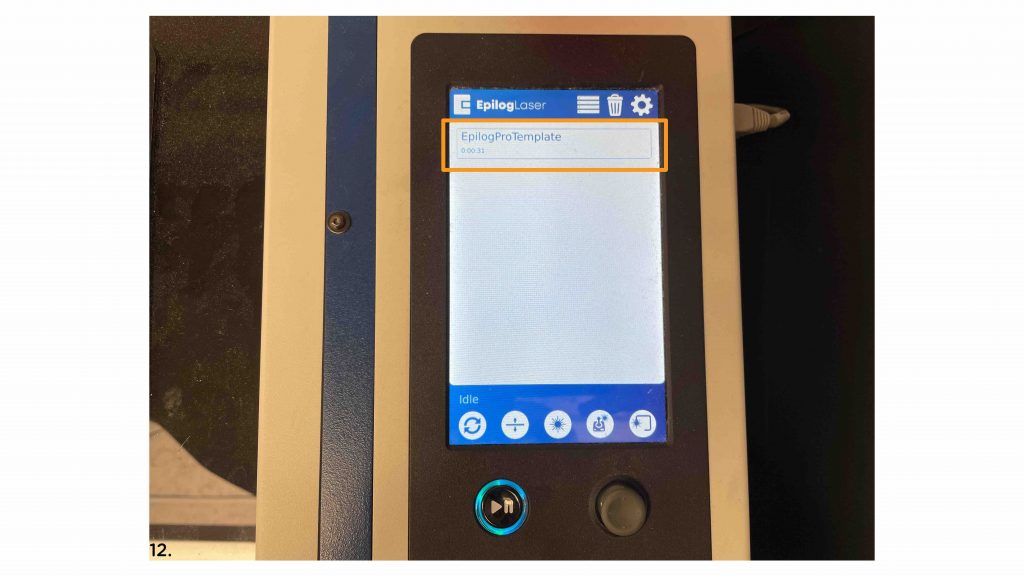
Your file name should appear on the screen of the laser cutter, the most recent file will be listed at the top of the list.
13.
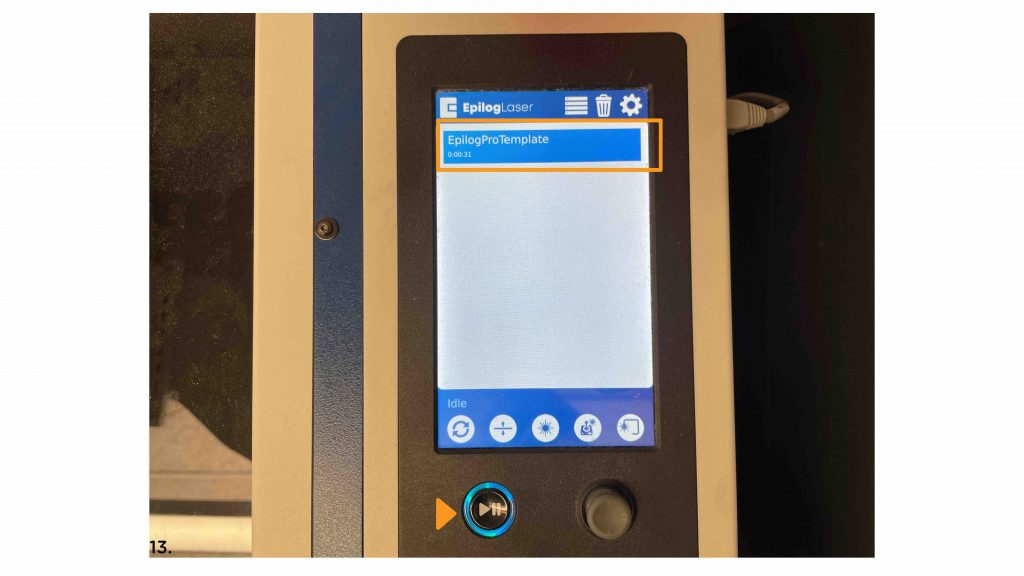
Tap the file you want to cut, it will turn blue to indicate it has been selected.
14.
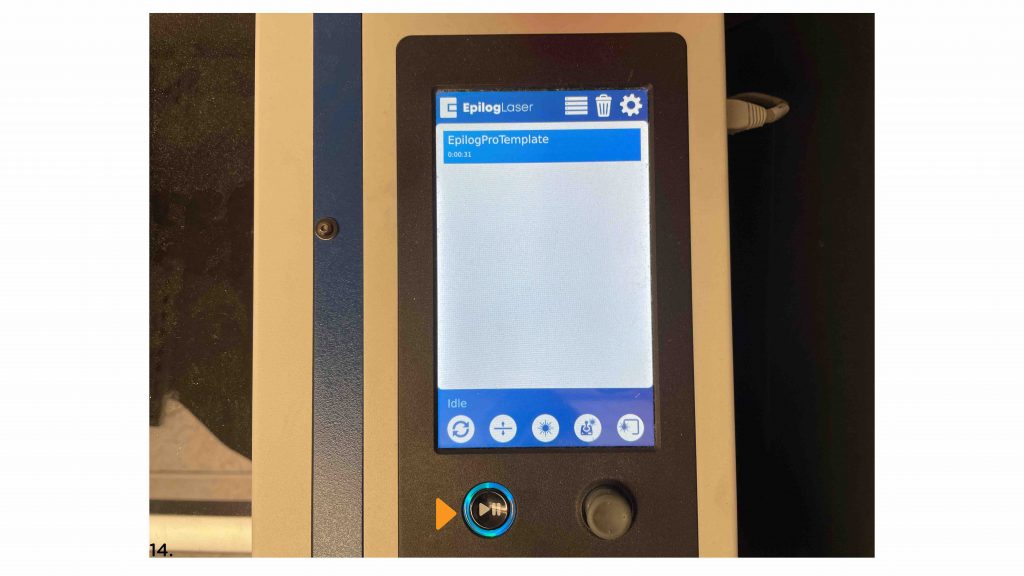
Once you’re ready to run the job, press the Play/Pause button illuminated with a blue circle.
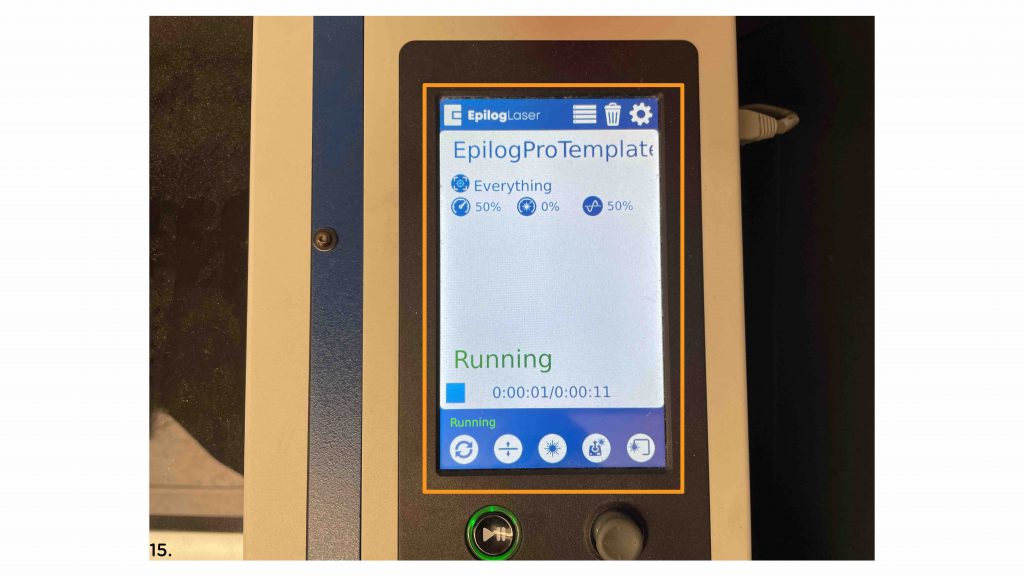
15.
Once the Play/Pause button is pressed the illumination will turn green indicating the job has been started.
The screen also shows the progress of the job including elapsed time and what part of the process has been completed.
After the job is finished please wait 1 minute for the fumes to dissipate before removing your material.